Understanding and Setting Up Proxy Servers
Configuring proxy server settings may seem complex, but, like most computer configurations, it's actually quite straightforward.
What is a Proxy Server?
A proxy server acts as an intermediary layer between your device and the internet, facilitating the connection between your web browser and internet services. Your internet traffic passes through this proxy in both directions.
Proxy servers are multipurpose tools. They enhance security, similar to a firewall, maintain privacy by masking your IP address, and can sometimes improve internet connection speeds.
Distinguishing Between System and Browser Proxy Settings
It's crucial to understand the difference between system-wide and browser-specific proxy server settings.
System Settings
System settings change how your device handles all internet traffic. Consequently, all data, regardless of the application, is routed through the proxy server. This is beneficial for comprehensive traffic management but can lead to bandwidth issues or application malfunctions if the proxy server isn't configured for specific traffic types.
Browser Settings
In contrast, browser settings direct only the browser's traffic through the proxy server. This configuration doesn't affect other internet data on your device. Remember to manually disconnect the proxy in your browser after use; otherwise, your browser will continue routing traffic through it.
Configuring Proxy Servers on Various Platforms
Windows 10
Part 1: Basic Proxy Server Settings
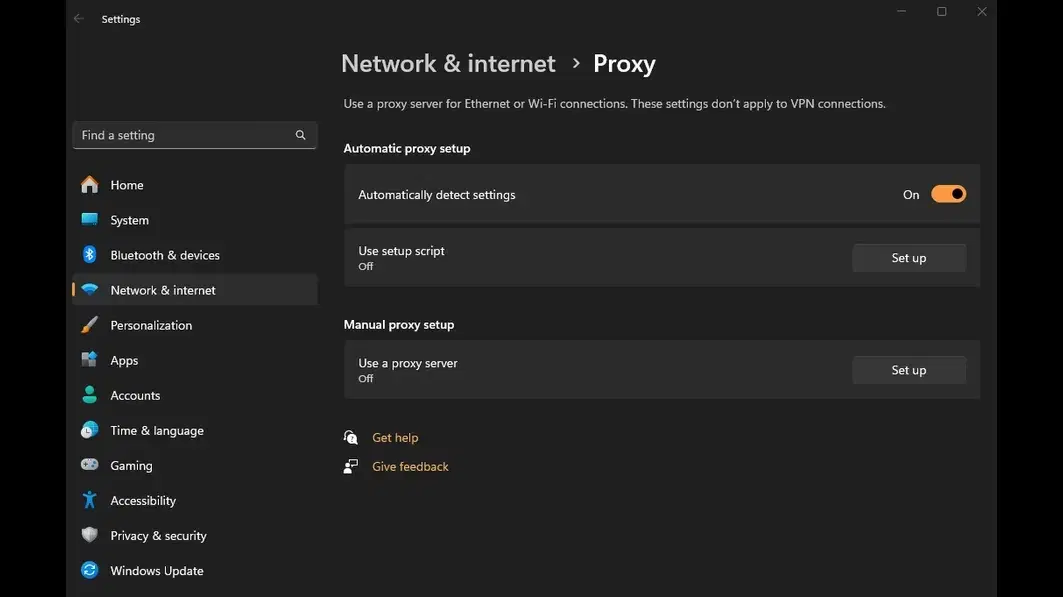
Search for proxy server settings or press Windows + I to open the main Settings menu.
Enable Automatically detect settings. In the Manual Setup, activate the Use a Proxy Server option.
Enter the proxy server IP address or hostname, and port number.
Click Save to apply these settings.
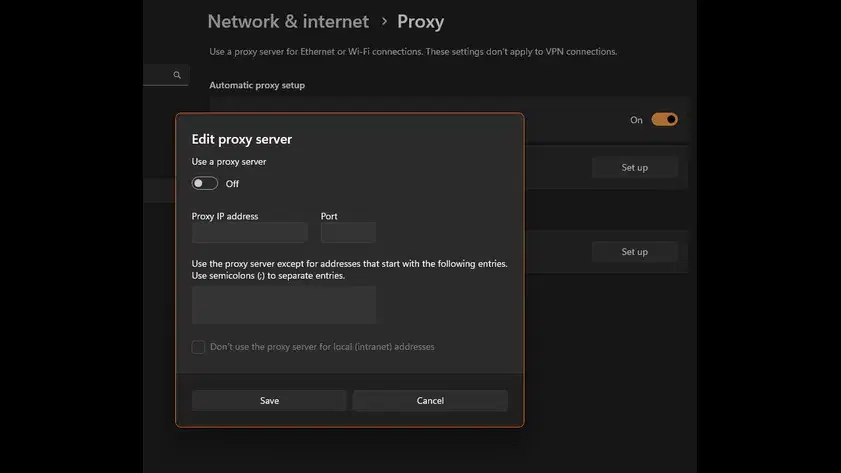
Part 2: Windows Credentials for Proxy Server
Search for credential manager or use the Settings menu.
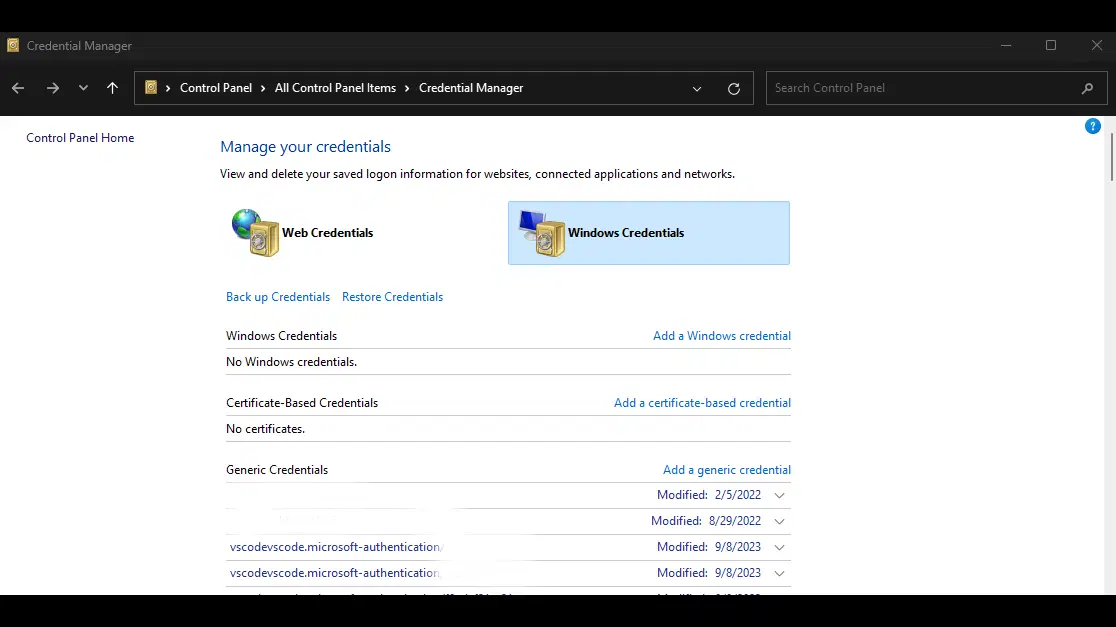
Select Windows Credentials and then Add a Windows credential.
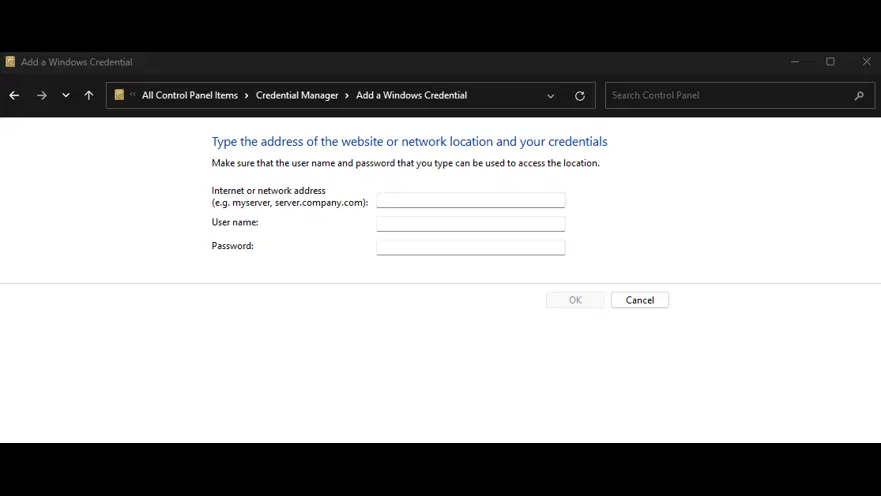
Enter the proxy servers IP address or hostname, along with your username and password.
Click Ok to complete the setup.
MacOS
Part 1: Basic Proxy Server Settings
Click the Apple logo in the top-left corner and select System Preferences.
Open Network settings, found in the lower-left section of the System Preferences window.
Select your network and click on Advanced in the bottom-right corner.
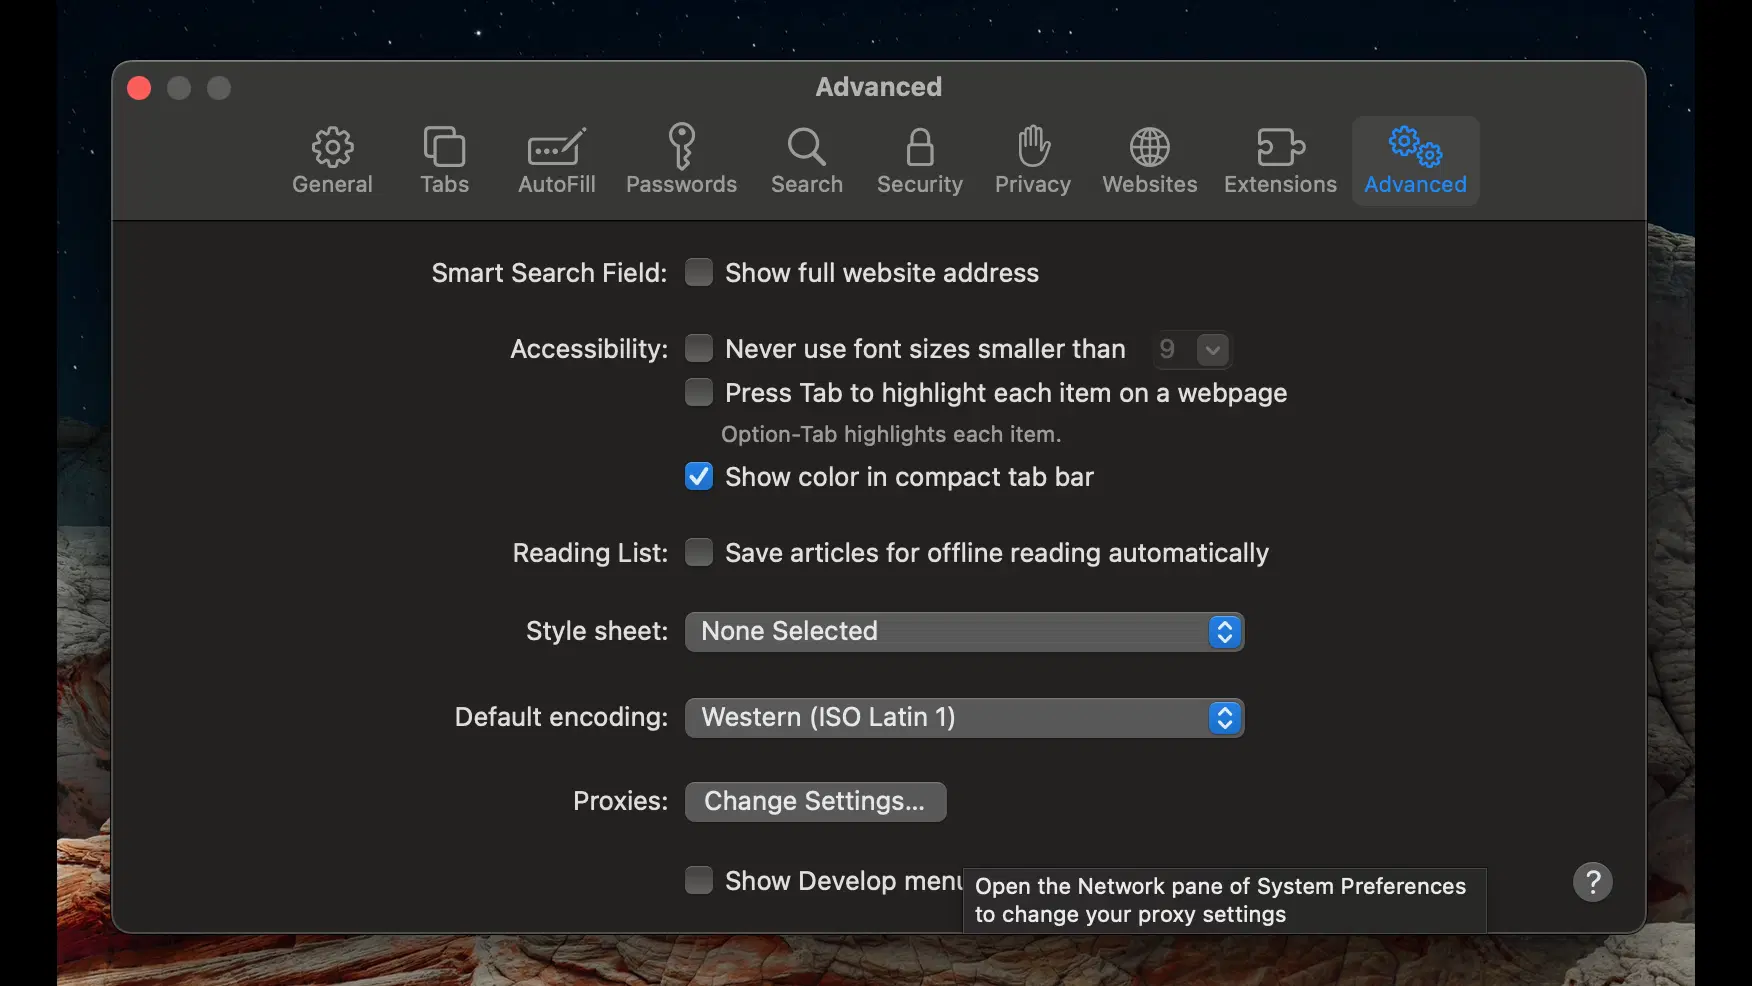
Go to the Proxies tab, select your proxy type, and enter the proxy server’s details.
Part 2: Manual Configuration of Proxy Server
In the Proxies tab, choose the proxy type (e.g., Web Proxy (HTTP), Secure Web Proxy (HTTPS), SOCKS Proxy).
Manually input the proxy server’s IP address or hostname and port.
If necessary, enter authentication details (username and password) under the Web Proxy Server or Secure Web Proxy Server section.
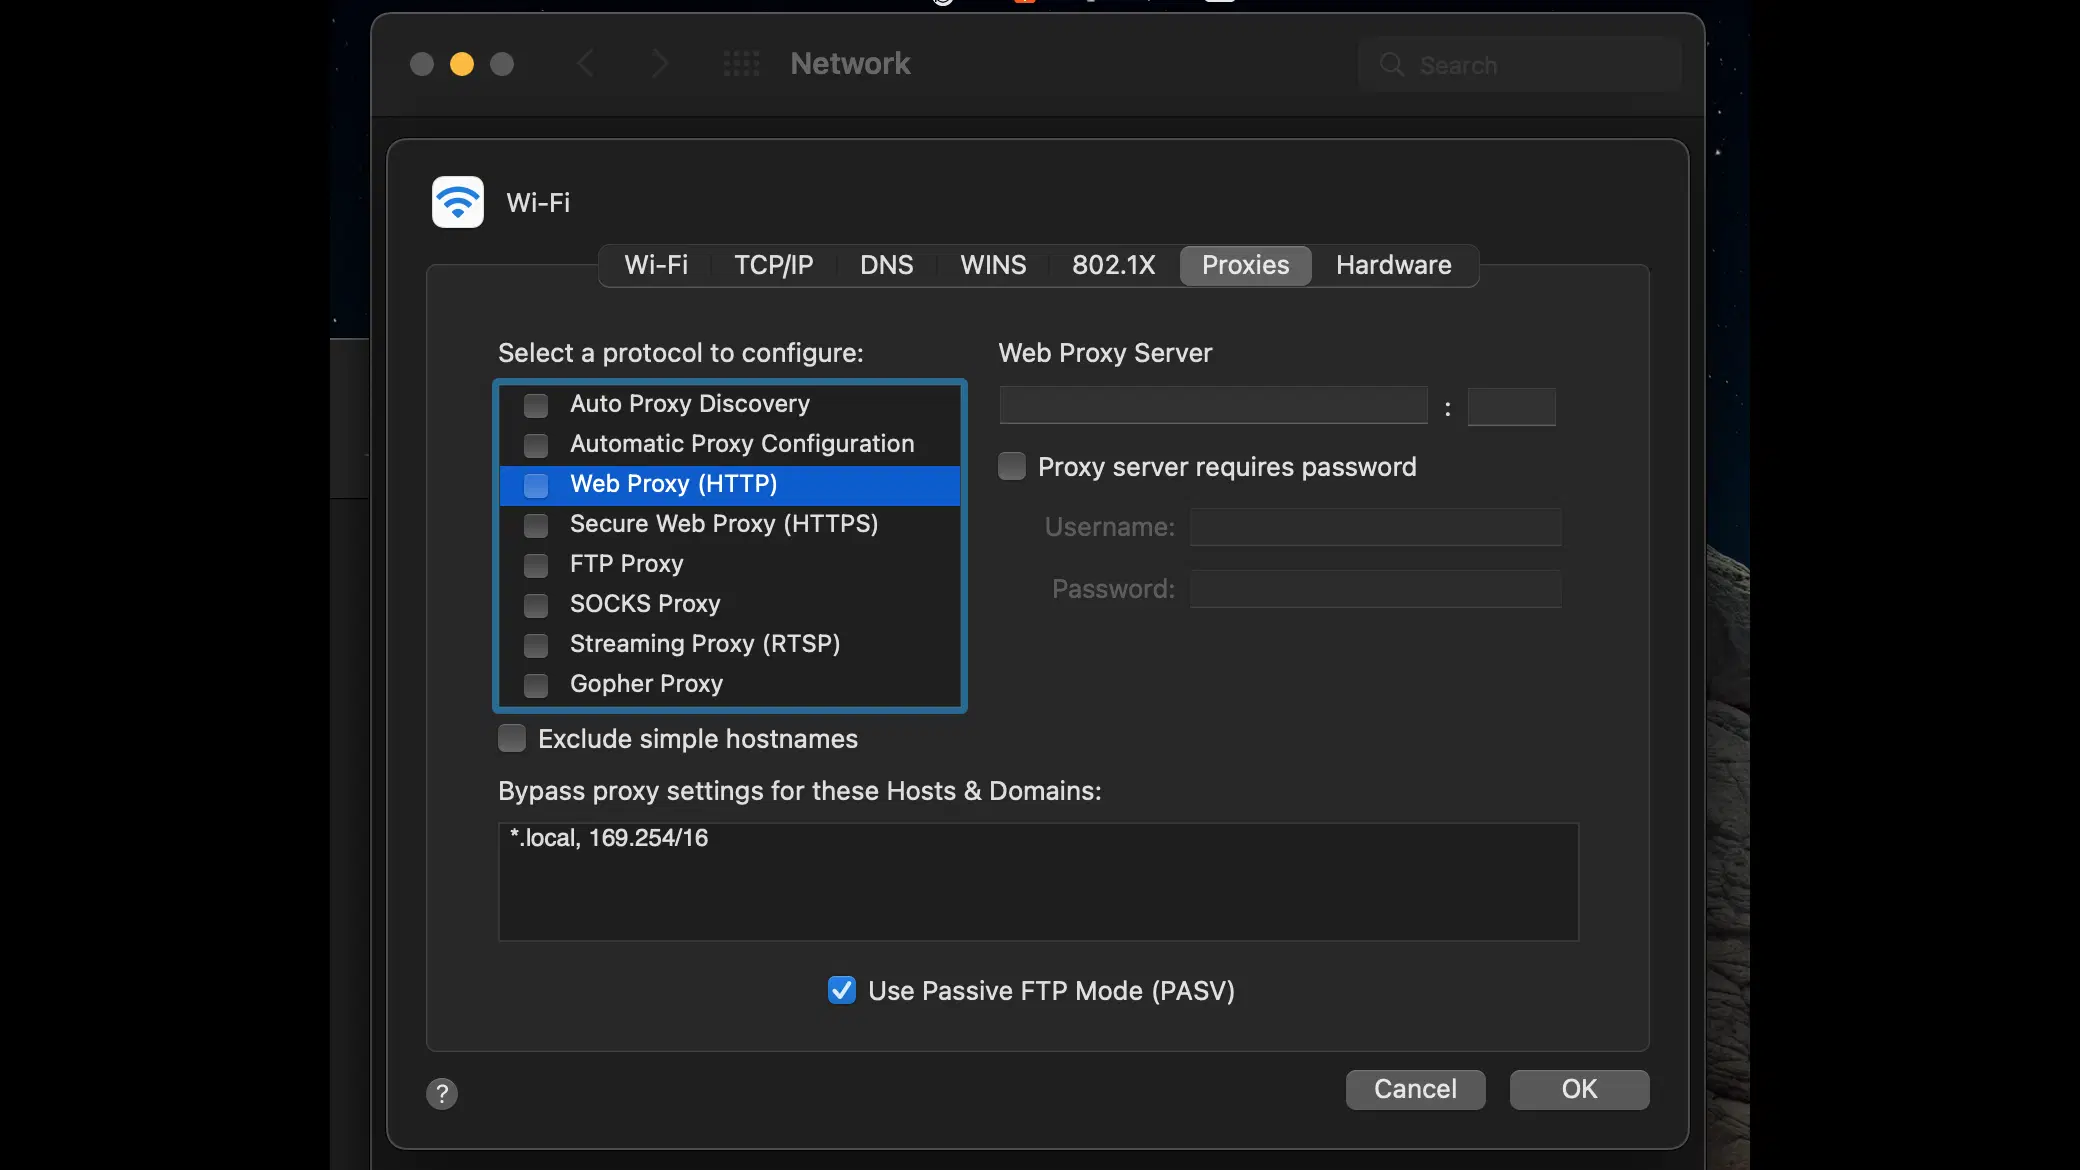
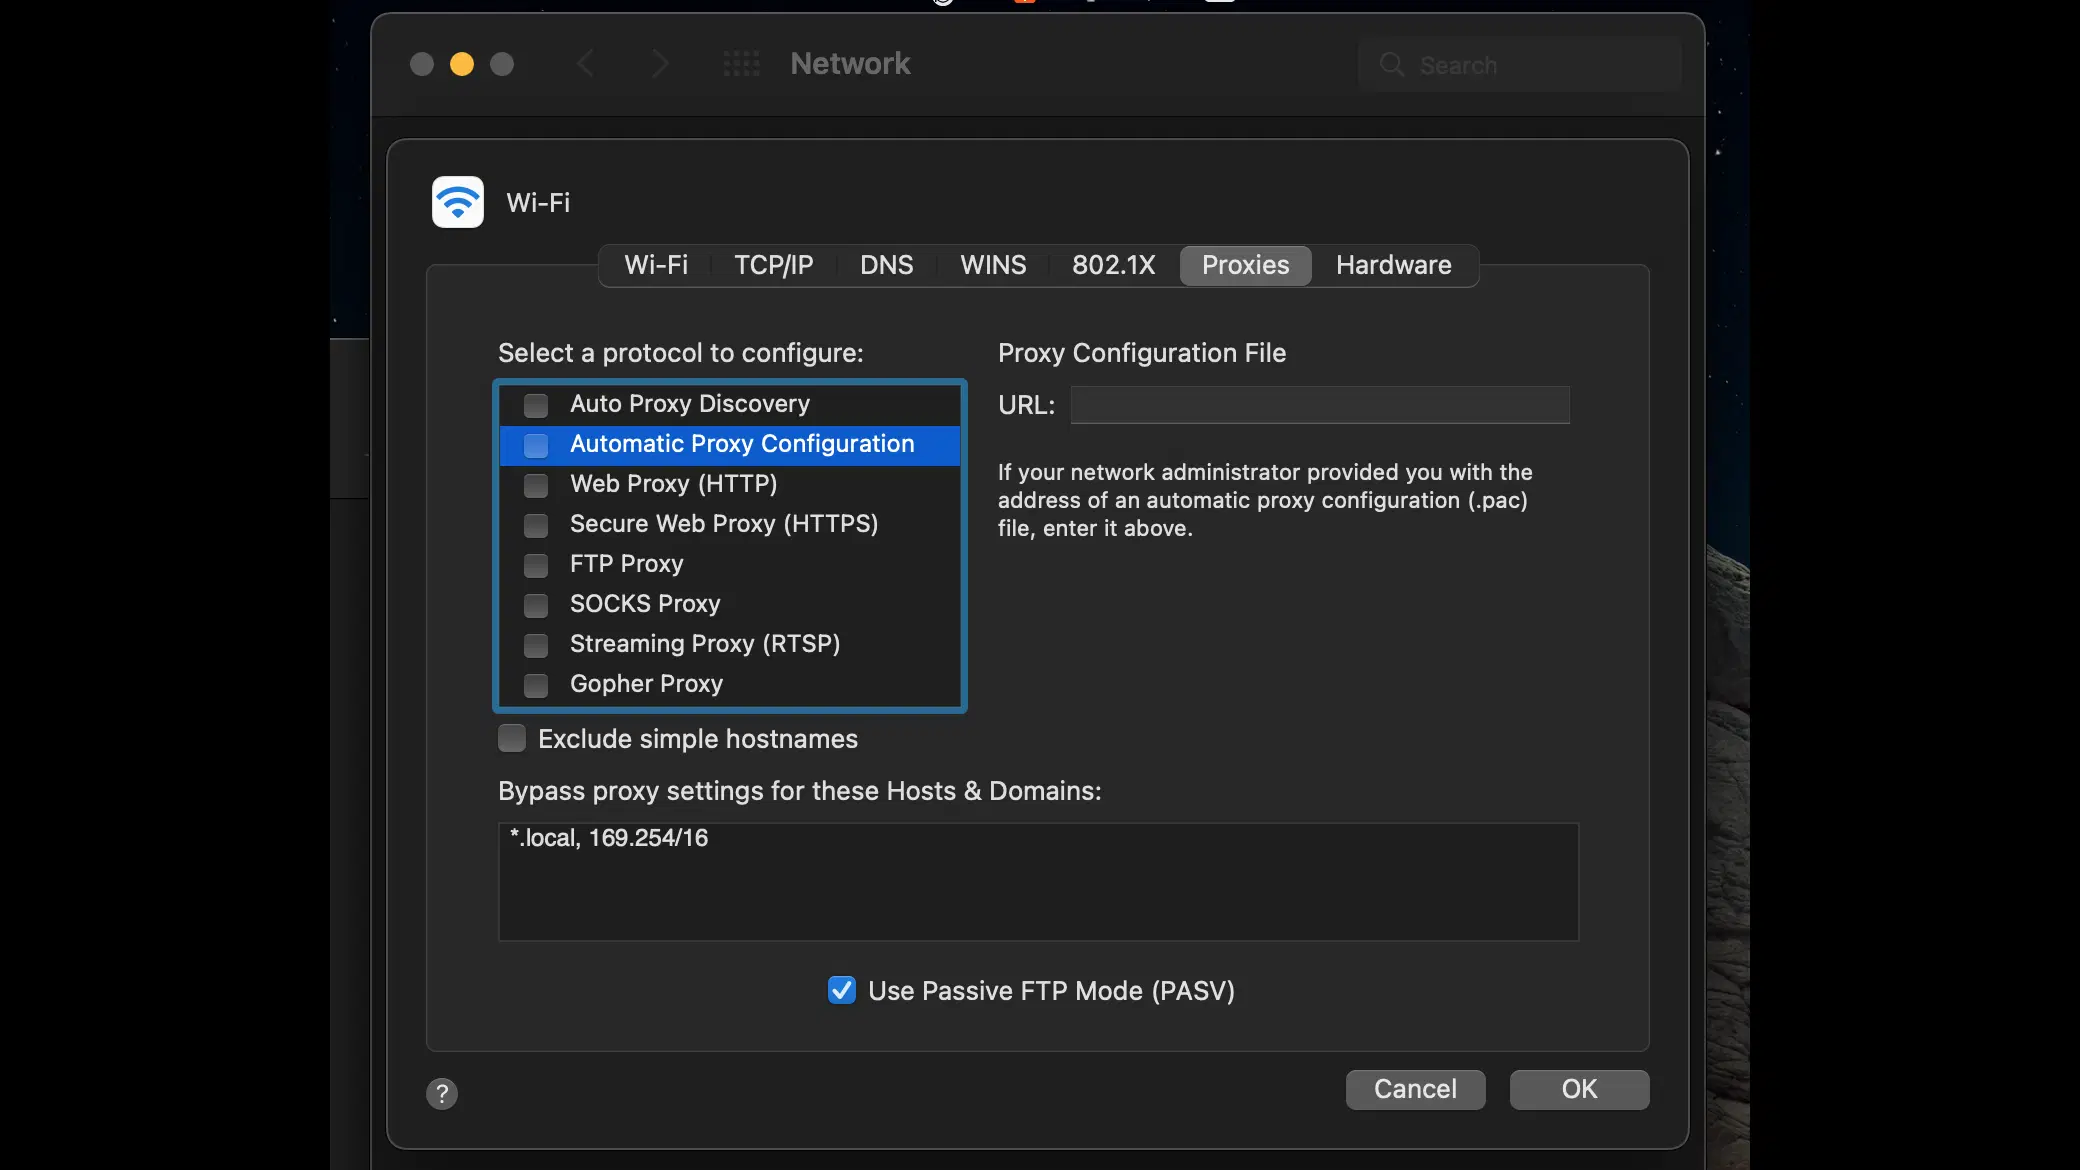
To use an automatic configuration script, enter the URL in the Automatic Proxy Configuration section.
Part 3: Saving and Testing Proxy Settings
Click OK and then Apply to save the proxy settings.
Test the proxy setup by visiting a site like Show My IP to verify if your IP address and location have changed.
Browser-Specific Settings
Chrome and Edge
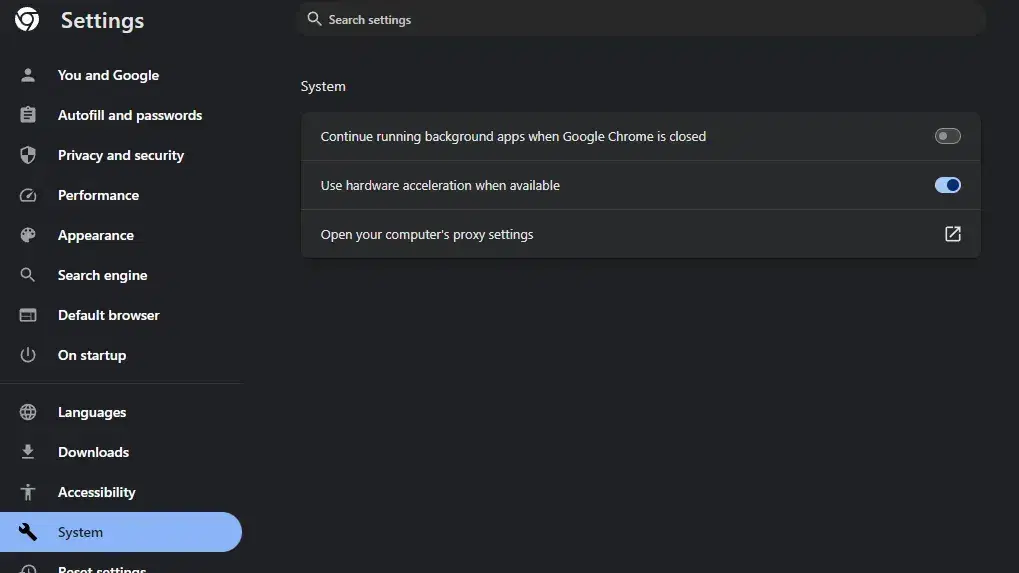
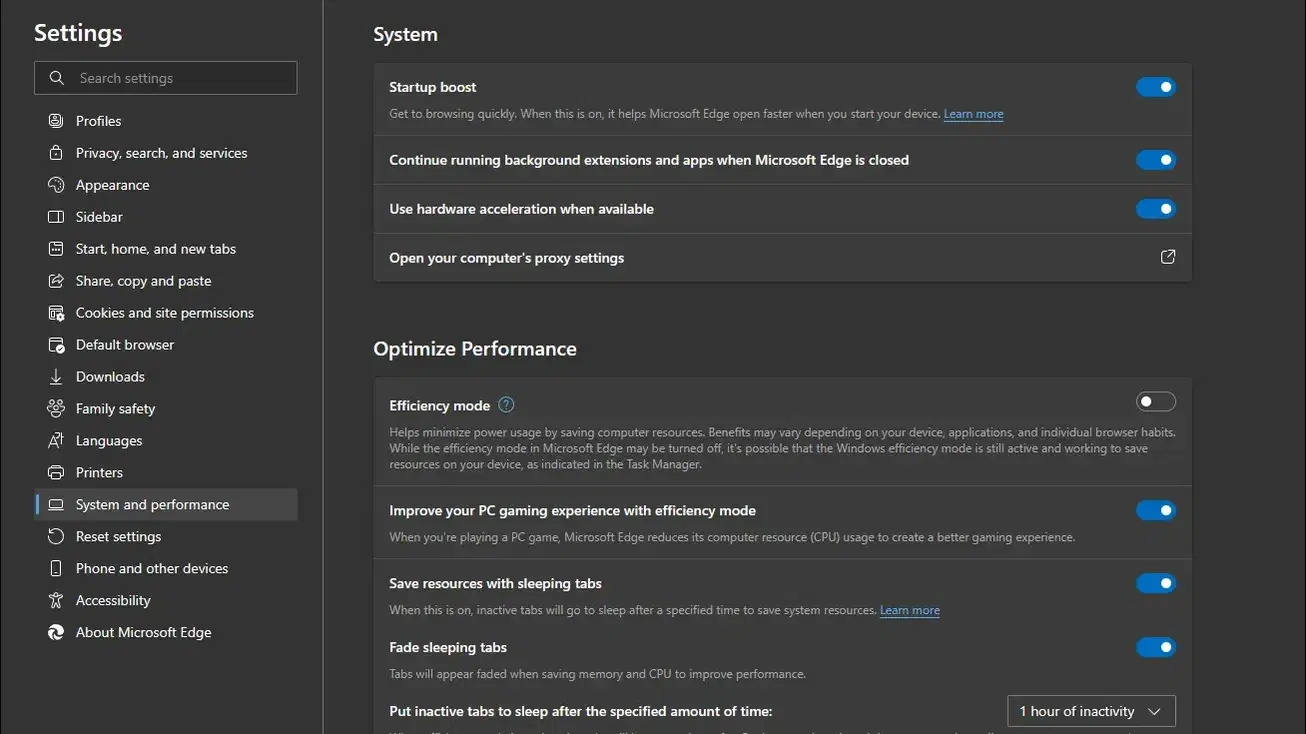
Chrome and Edge use the system settings for proxy configurations. Changing proxy settings in these browsers directs you to the respective system settings for Windows or MacOS.
Safari
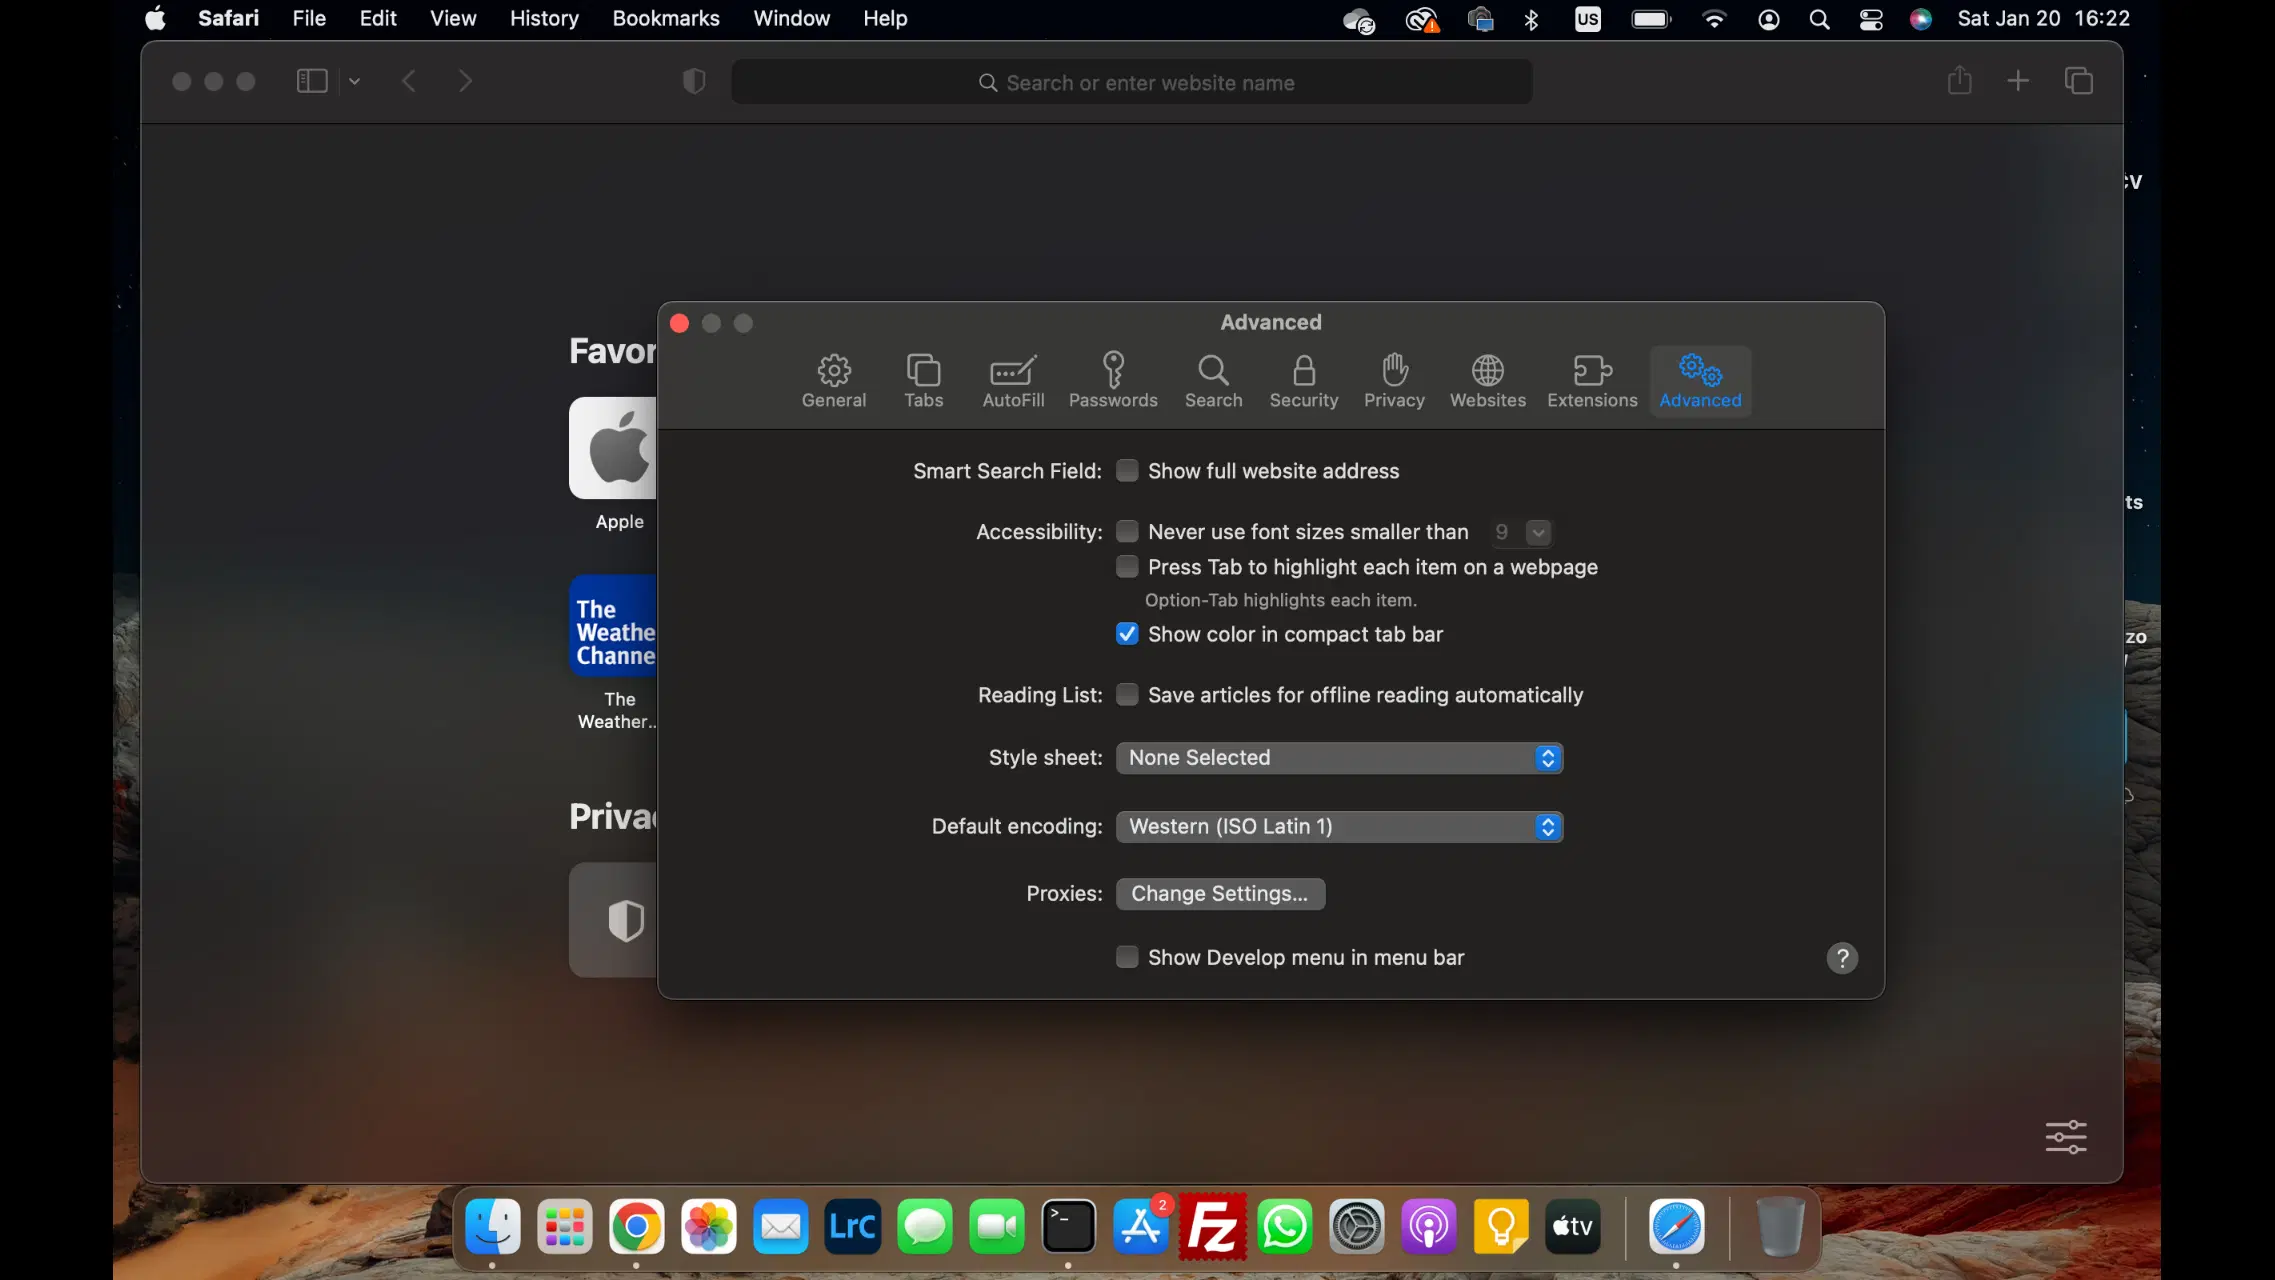
Safari's proxy settings align with the system settings in MacOS, accessible through Safari's Preferences under the Advanced tab.
Firefox
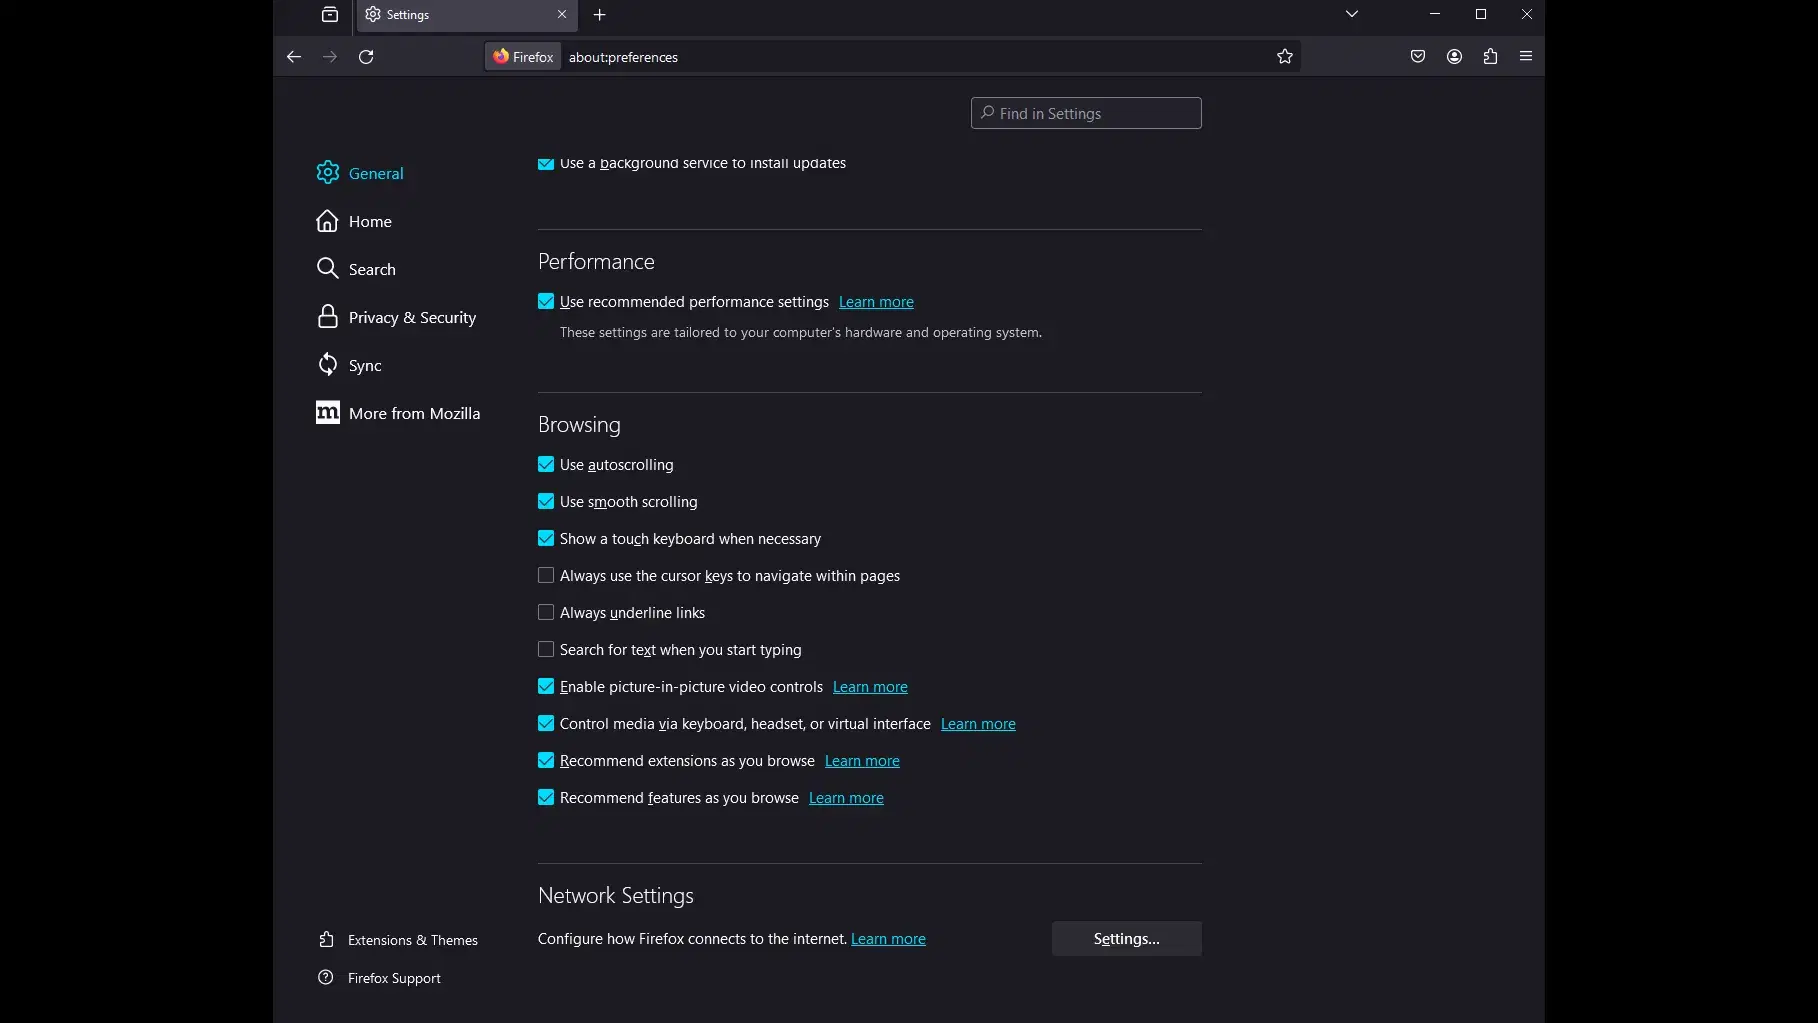
Firefox allows both browser-level and system-level proxy configurations. Access its settings through the menu and select Settings, scroll down to Network Settings and configure the proxy.
Mobile Devices
Android
Accessing Wi-Fi Settings:
Go to Network & internet in the Settings app.
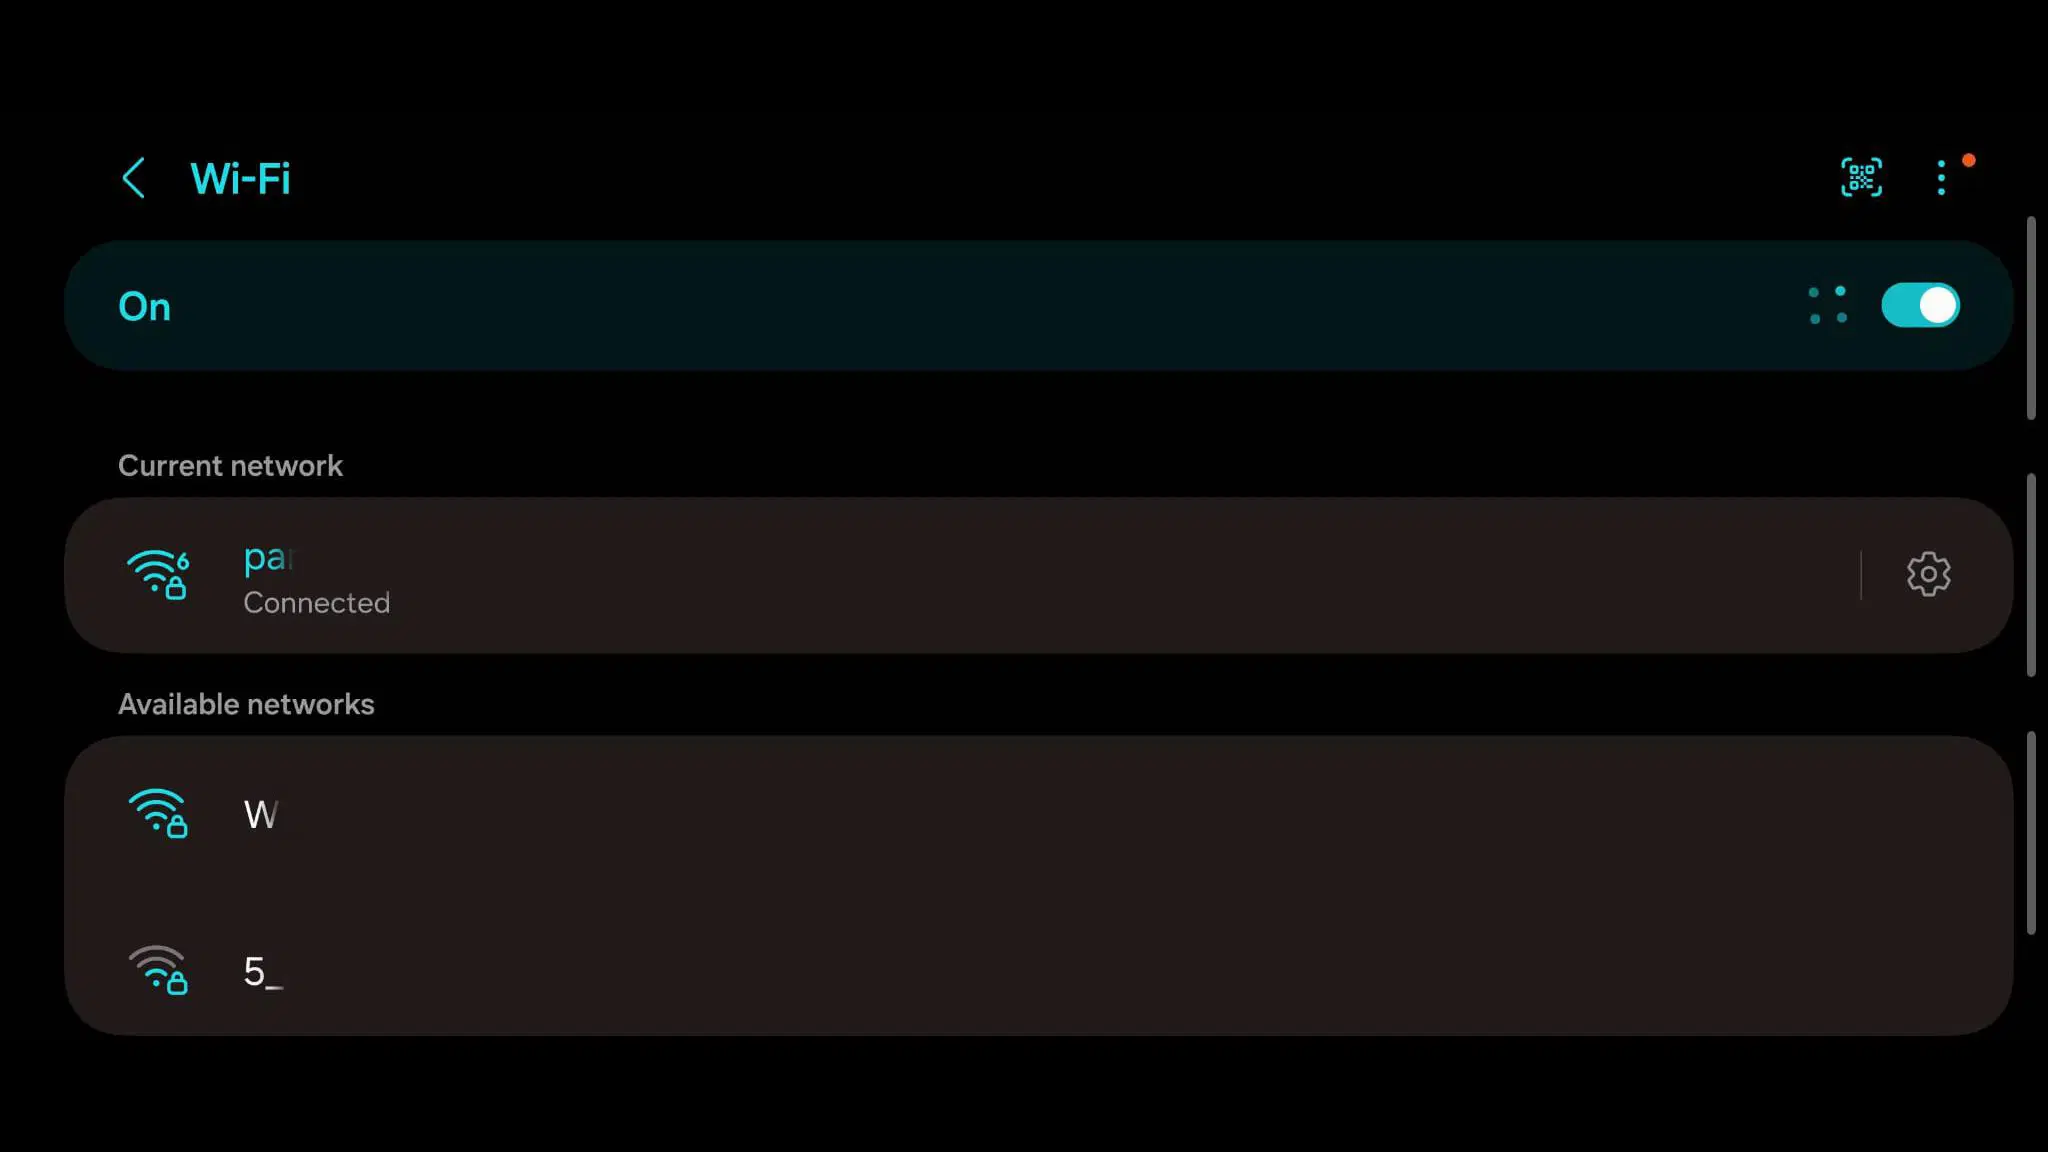
Tap on Internet to see the available networks.
You will see a list of Wi-Fi networks in your area.
Modifying Network for Existing Connections:
If you are already connected to a network, tap on it in the Internet page of the Settings app.
For a saved network in range but not connected, tap and hold the network name, then select Modify.
Tap on the Proxy button in the middle.
In the pop-up window, tap on Advanced options to extend the menu.
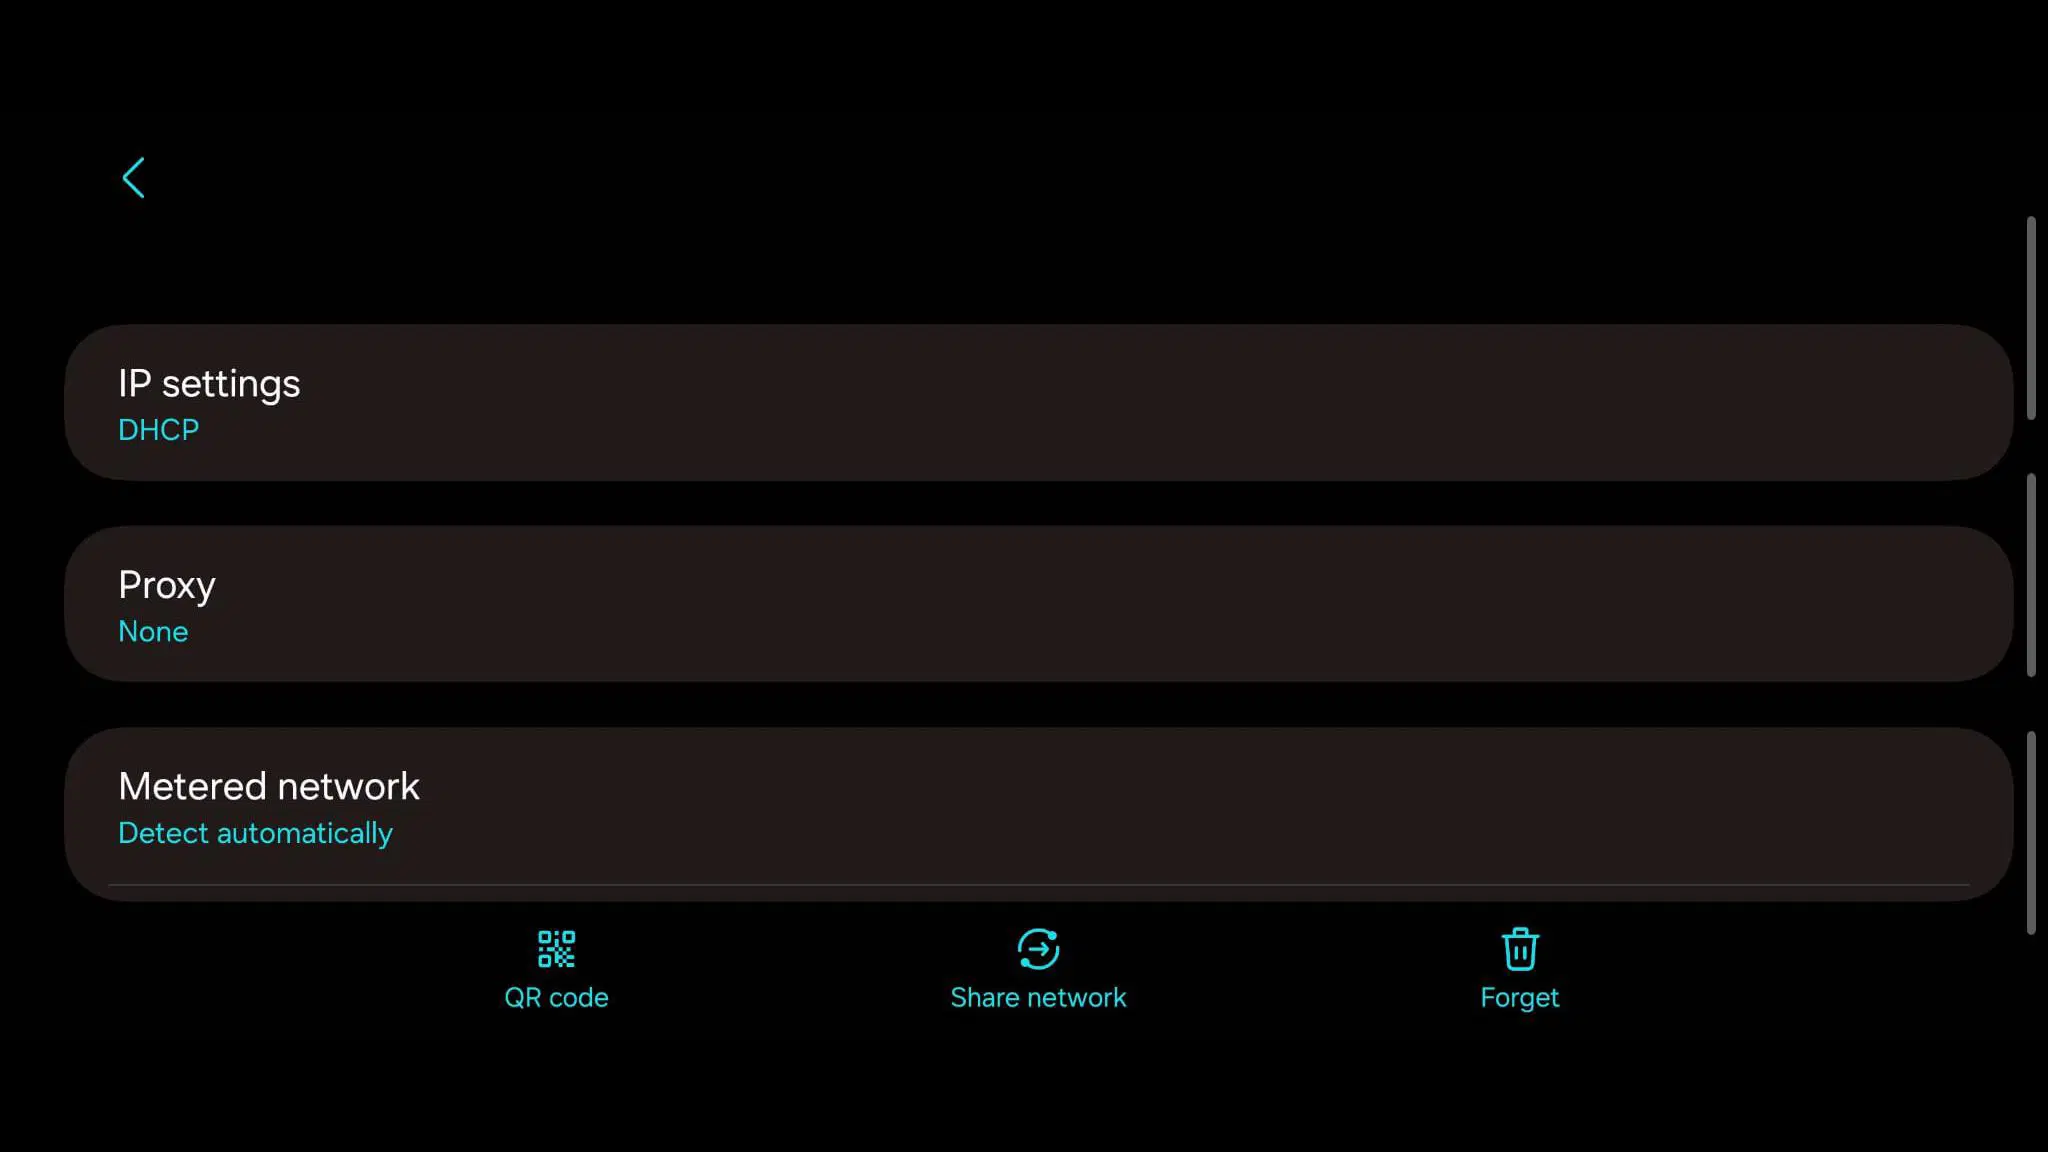
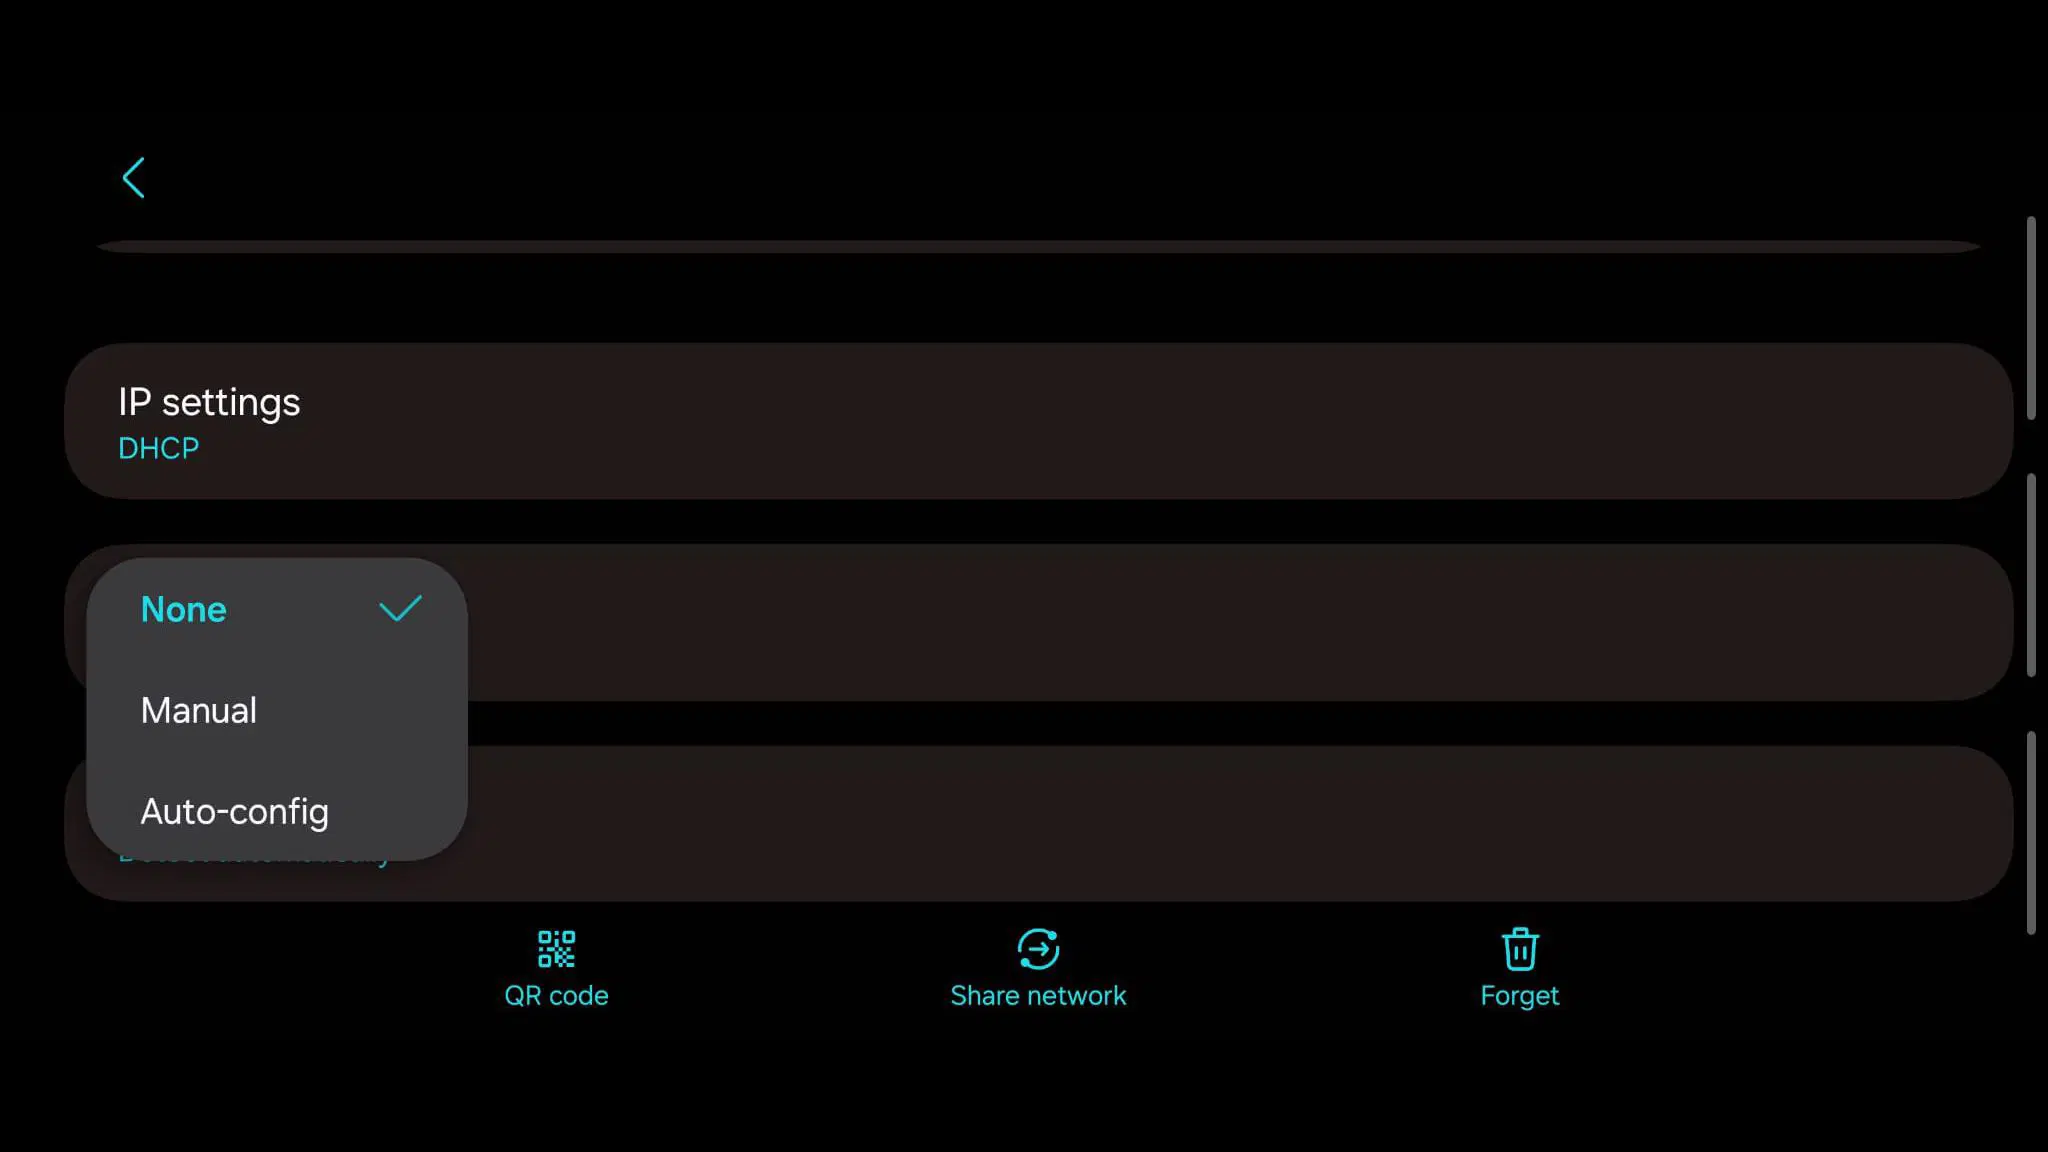
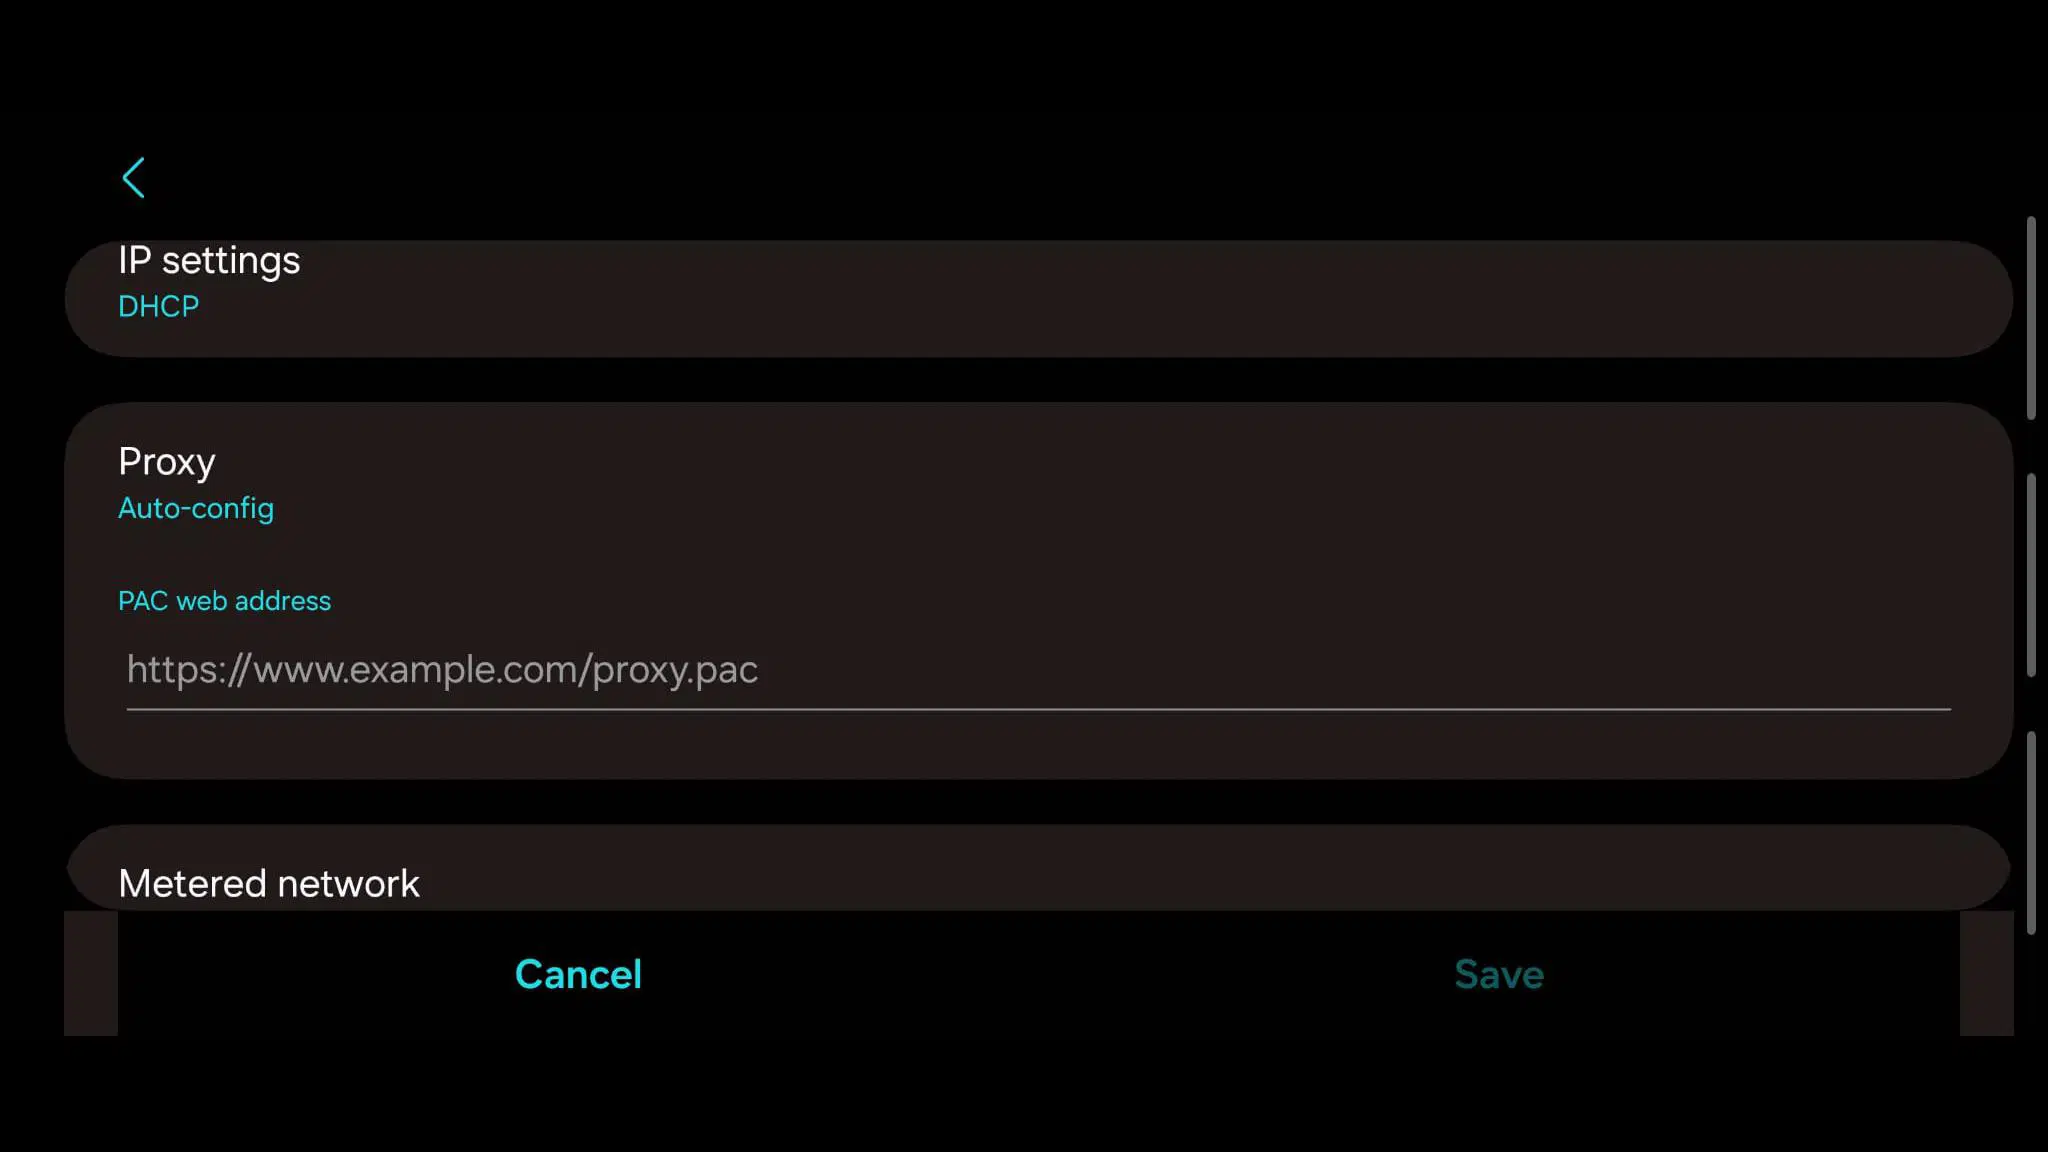
In the Proxy section, choose either Manual or Proxy Auto-Config.
Enter the proxy information and tap Save to apply changes.
Setting Proxy for New Connections:
Tap on the network name in the Internet page of the Settings app.
In the pop-up window requesting a password, tap on Advanced options.
Choose Manual in the Proxy setting and enter the necessary information.
Continue with the normal authentication process and then click Connect.
Entering Proxy Details:
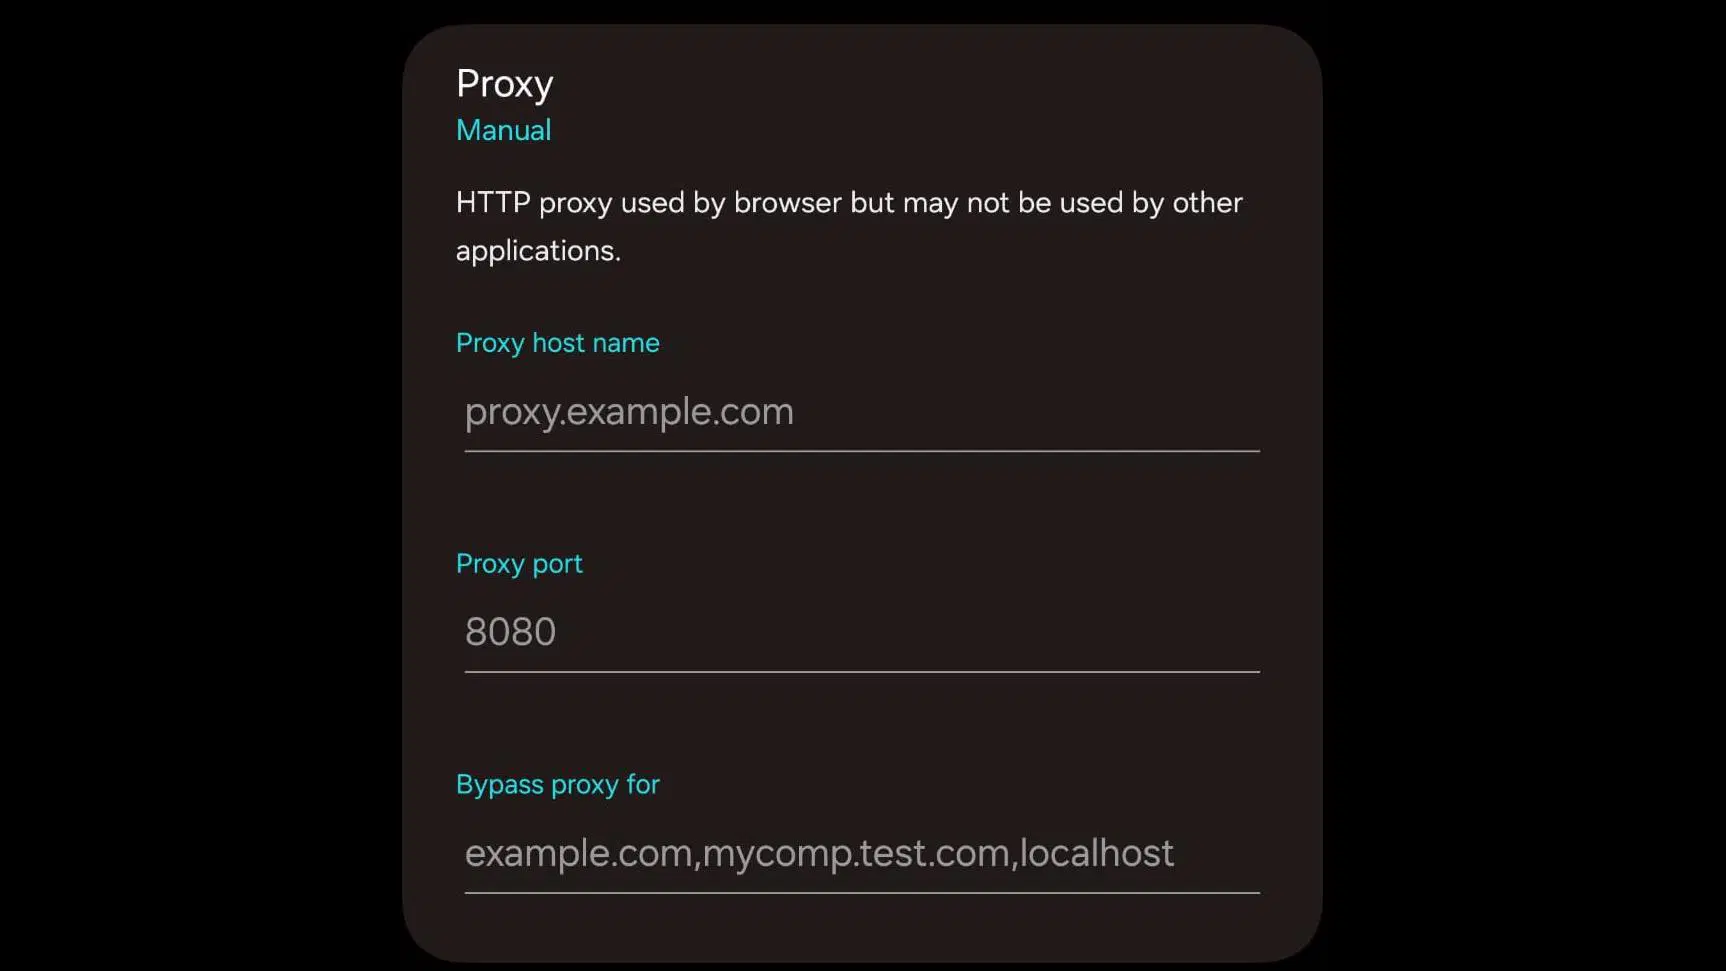
Choose Manual in the proxy dropdown.
Enter the proxy server’s information such as Proxy hostname and Proxy port.
You can also specify websites to bypass the proxy in the Bypass proxy for field.
Authenticate your proxies if necessary when you open your web browser.
Test your proxies to ensure they are working correctly
iOS
This guide provides step-by-step instructions for configuring a proxy on an iOS 15 device.
Open Settings
Begin by opening the Settings app on your iPhone.
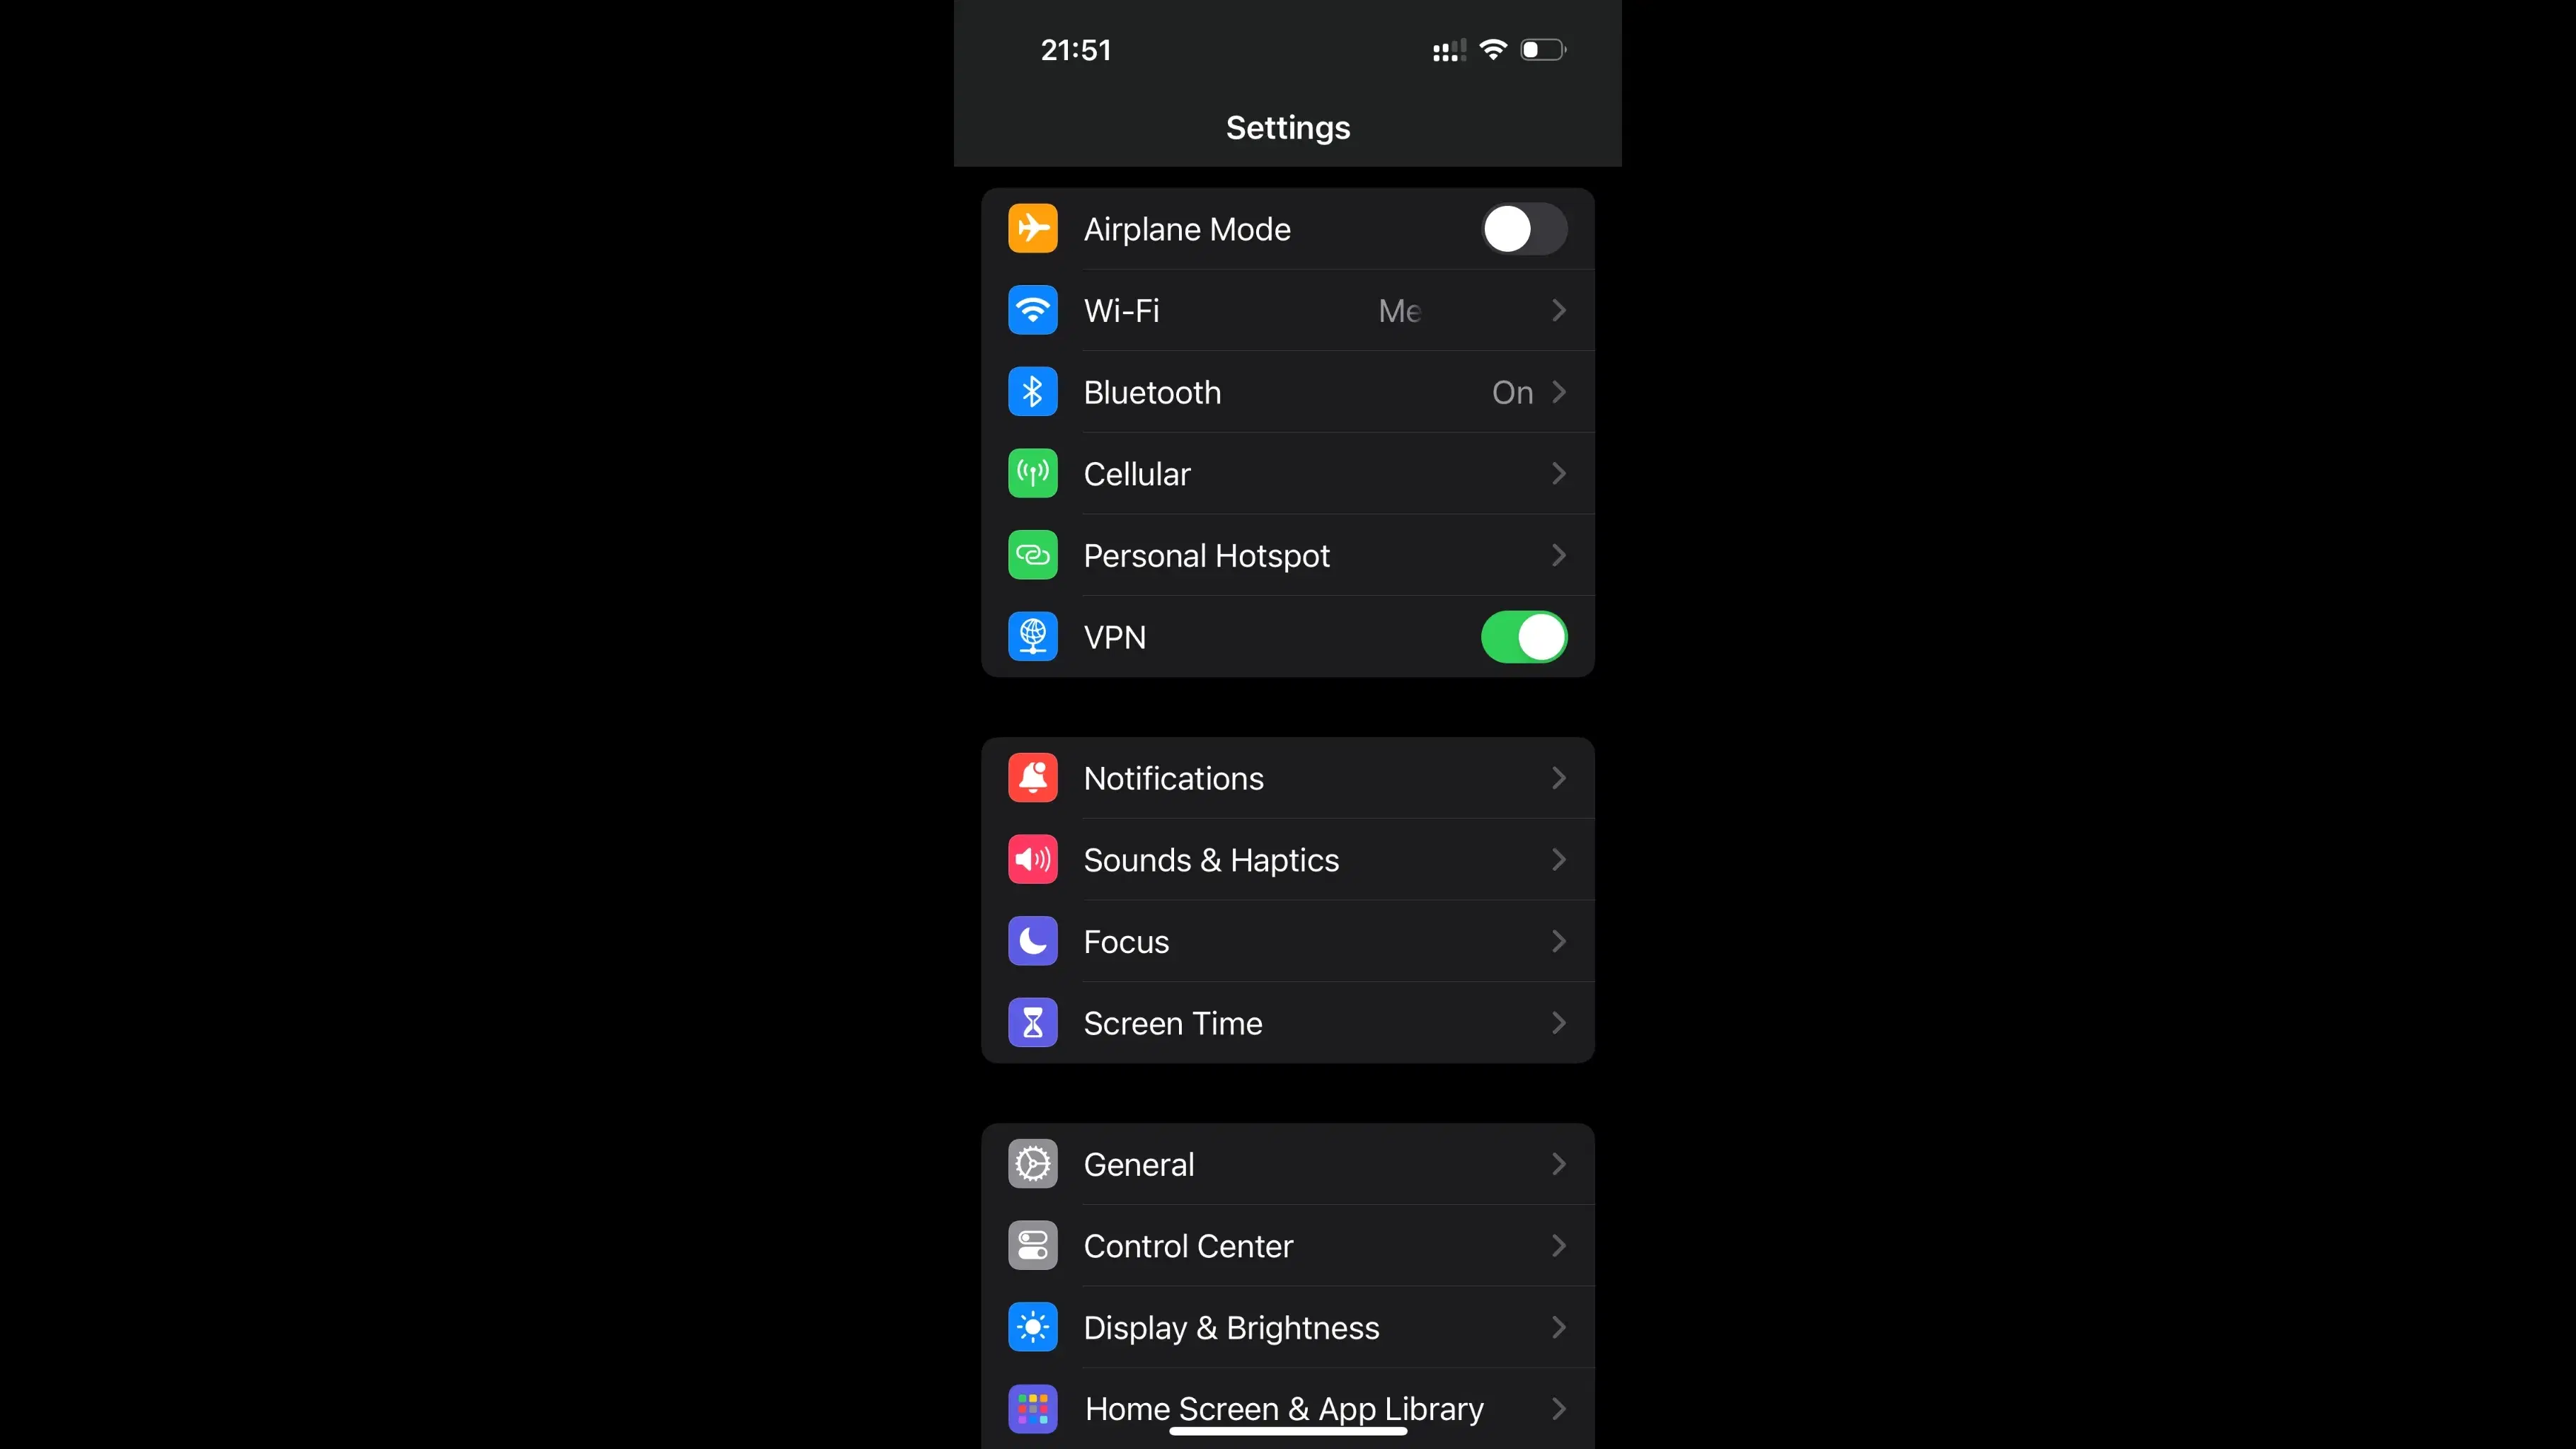
Access Wi-Fi Settings
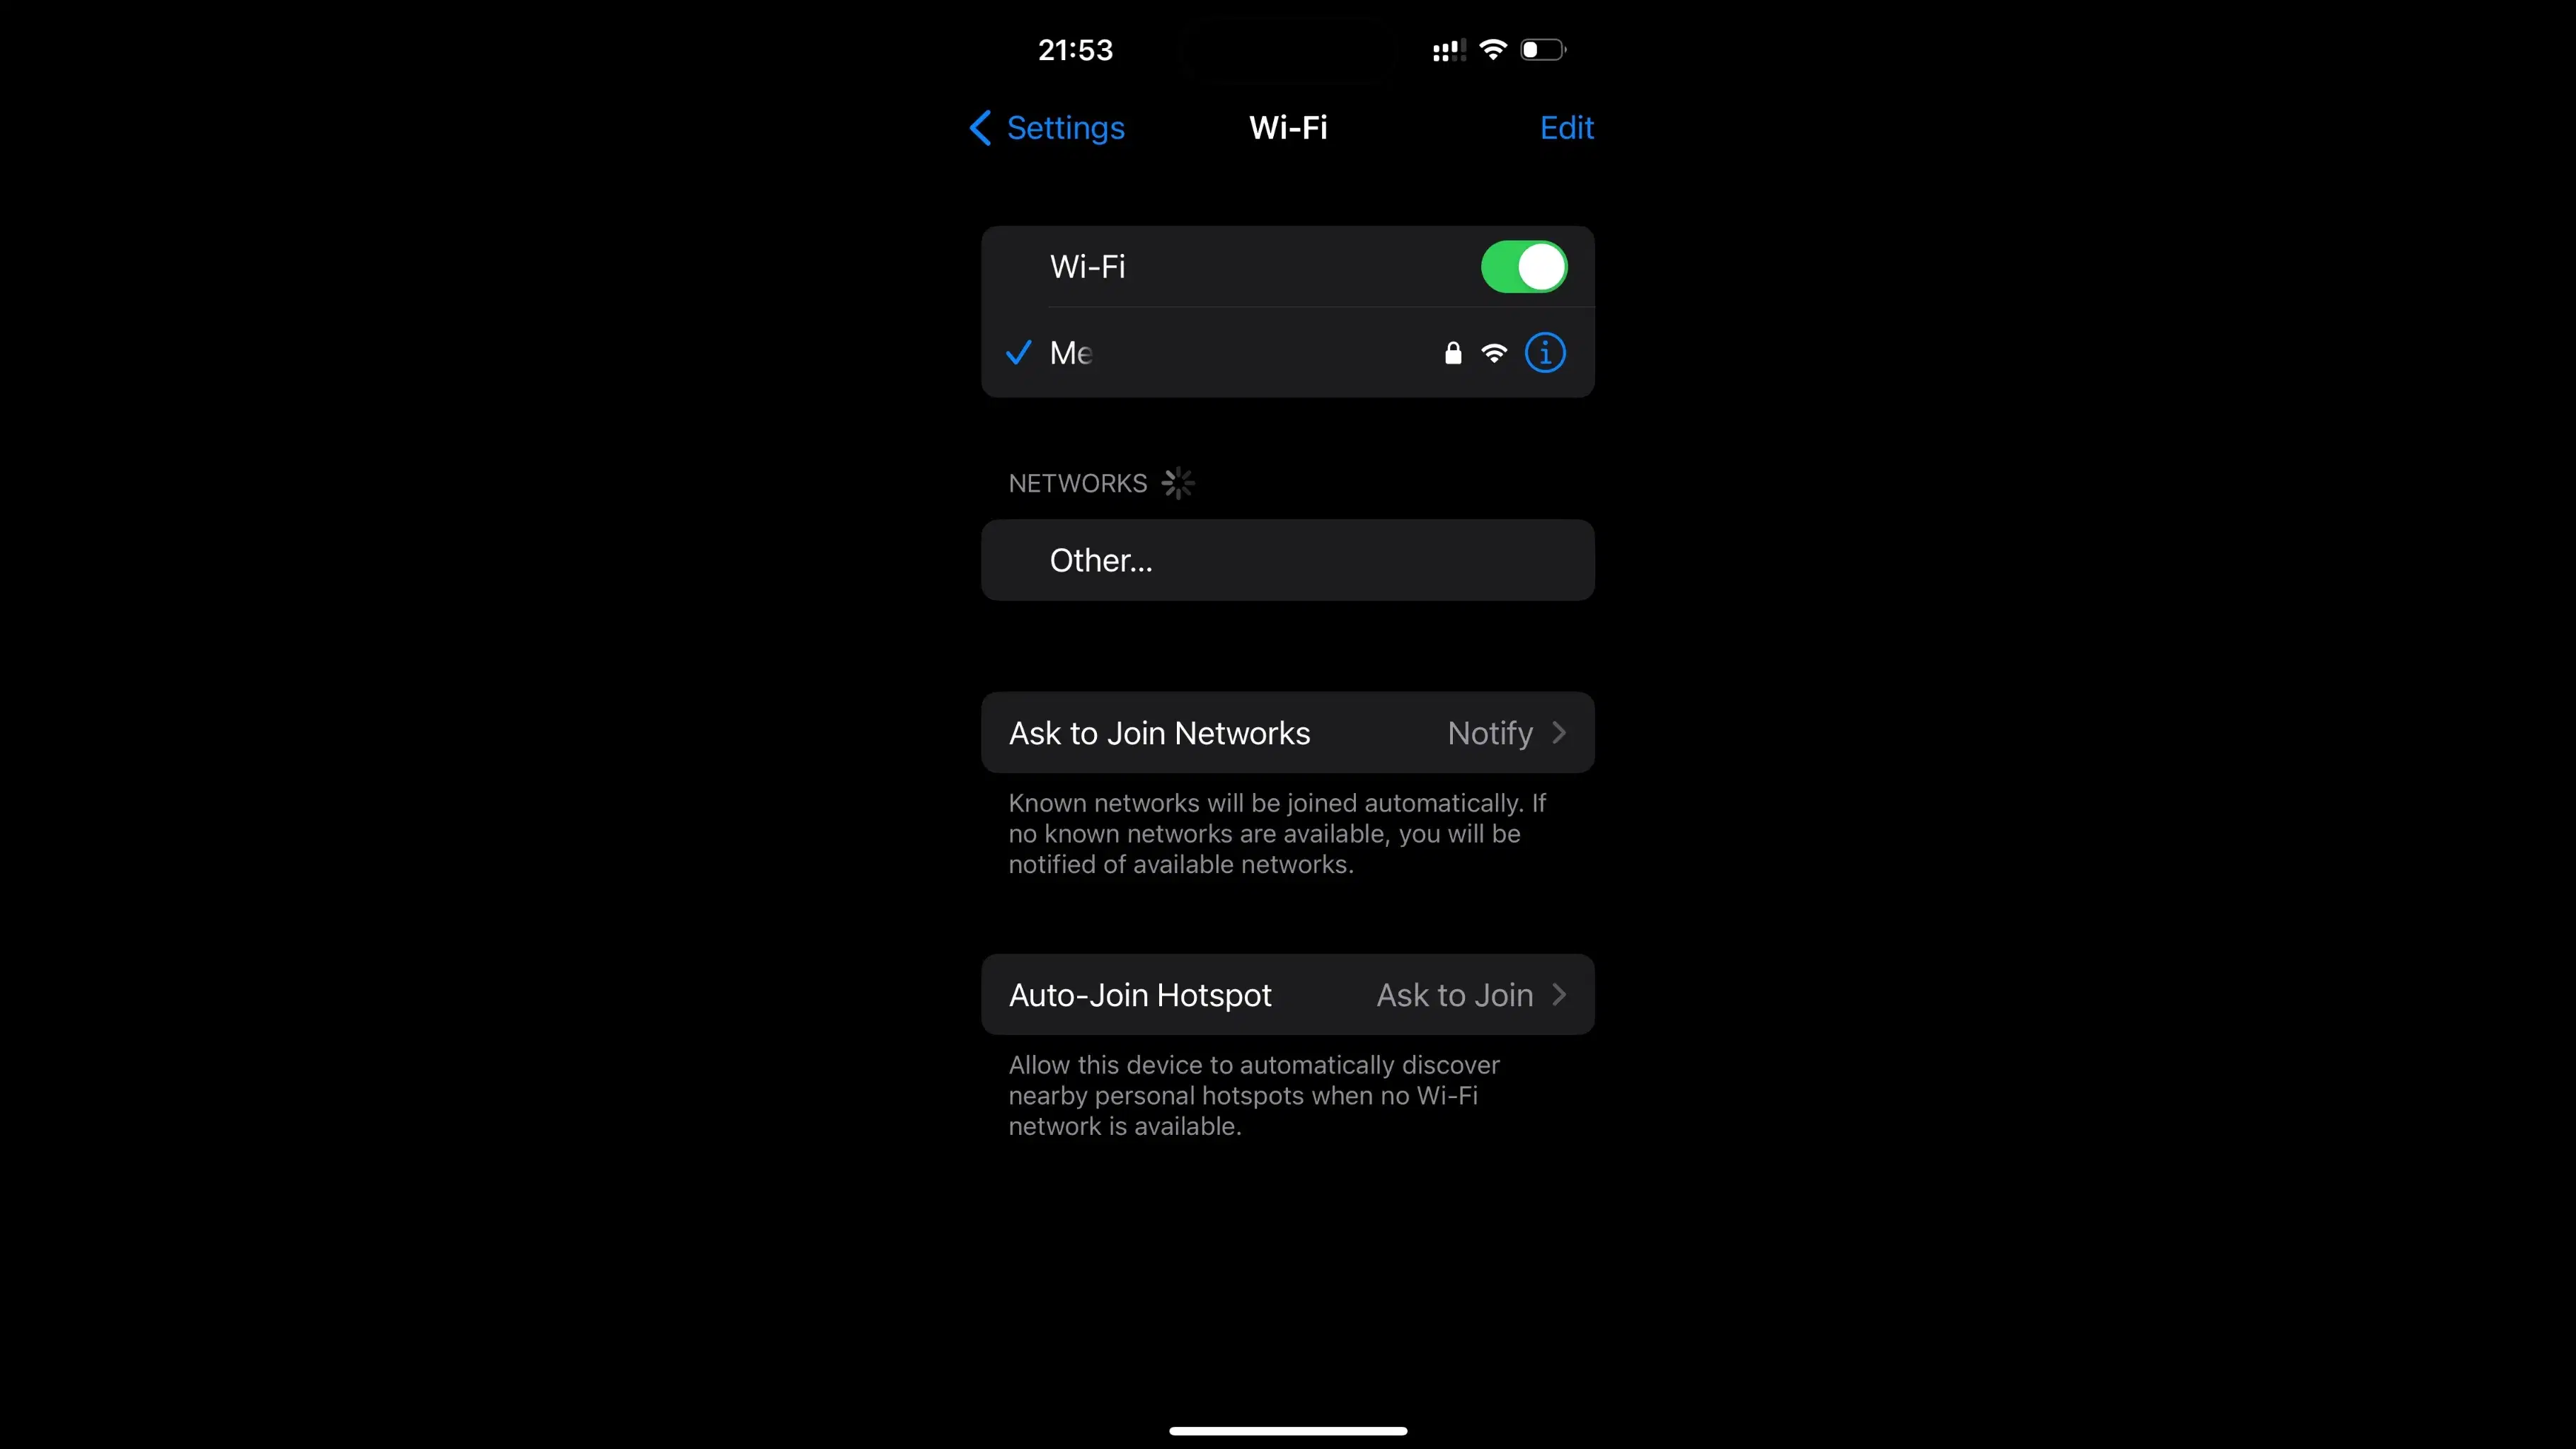
In the Settings menu, tap on Wi-Fi.
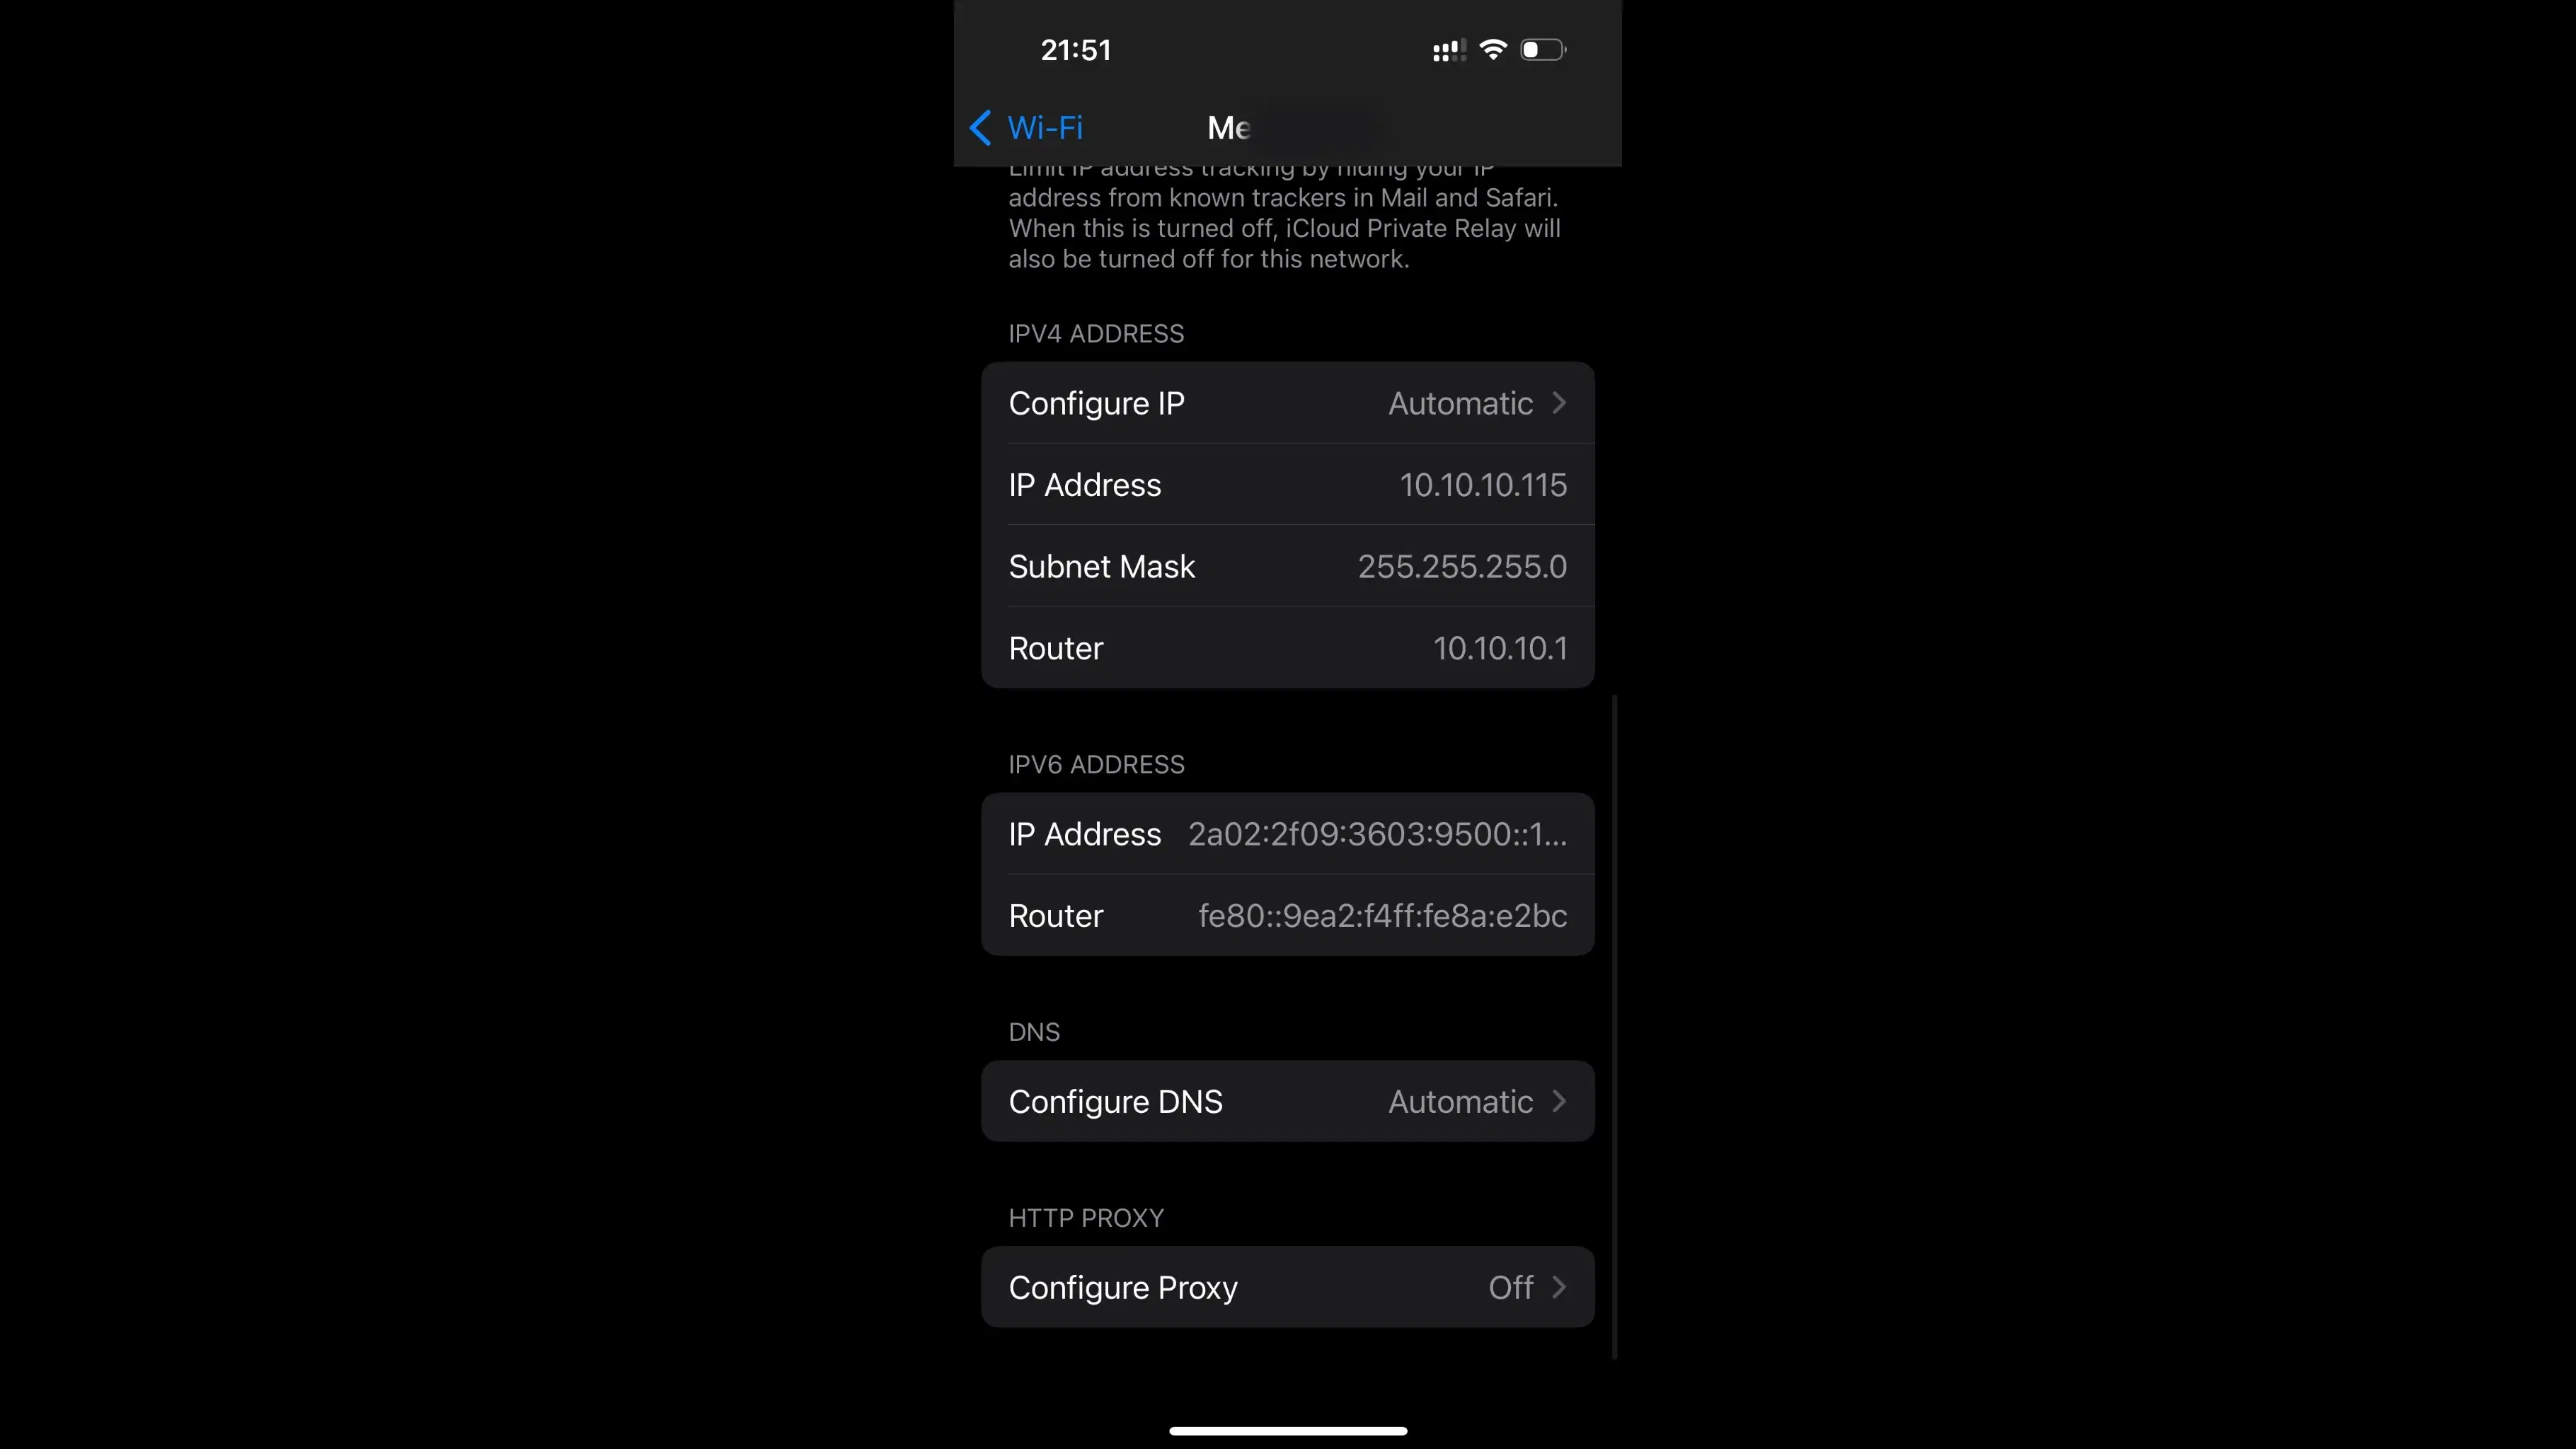
Locate and select the Wi-Fi network you're currently connected to.
Configure Proxy
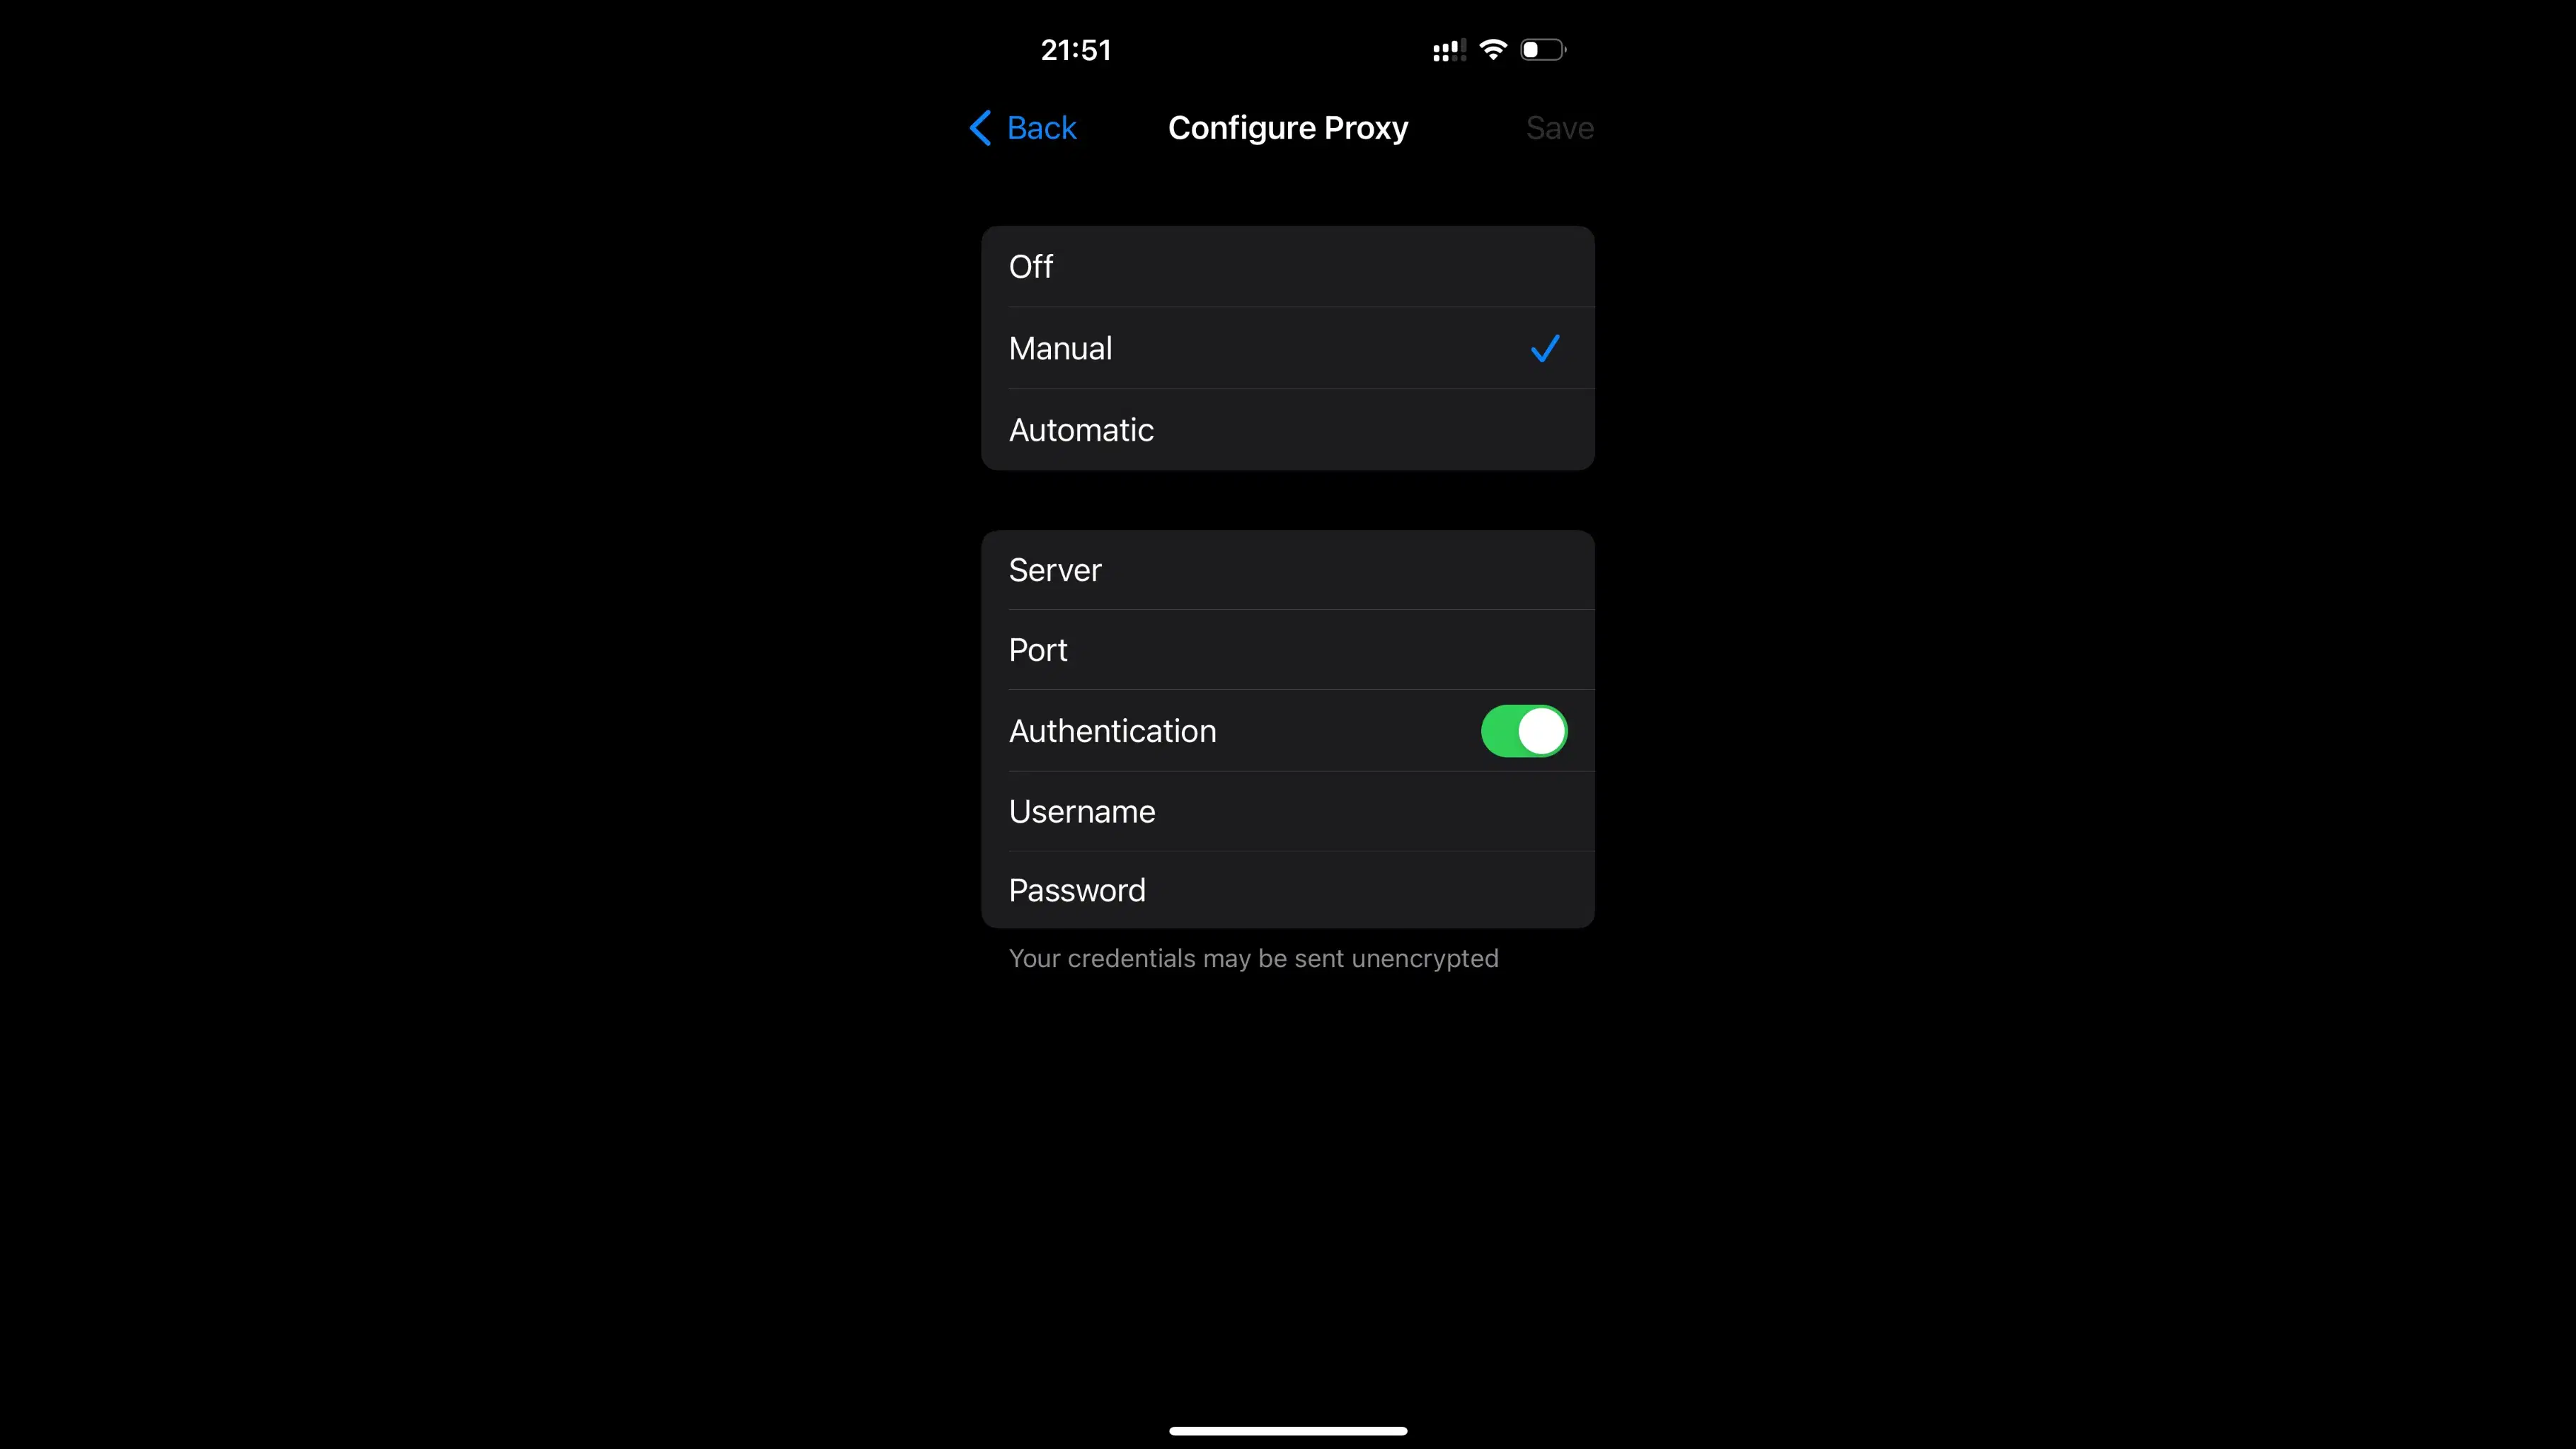
Scroll down and tap on Configure Proxy.
You will see three options: Off, Manual, and Automatic.
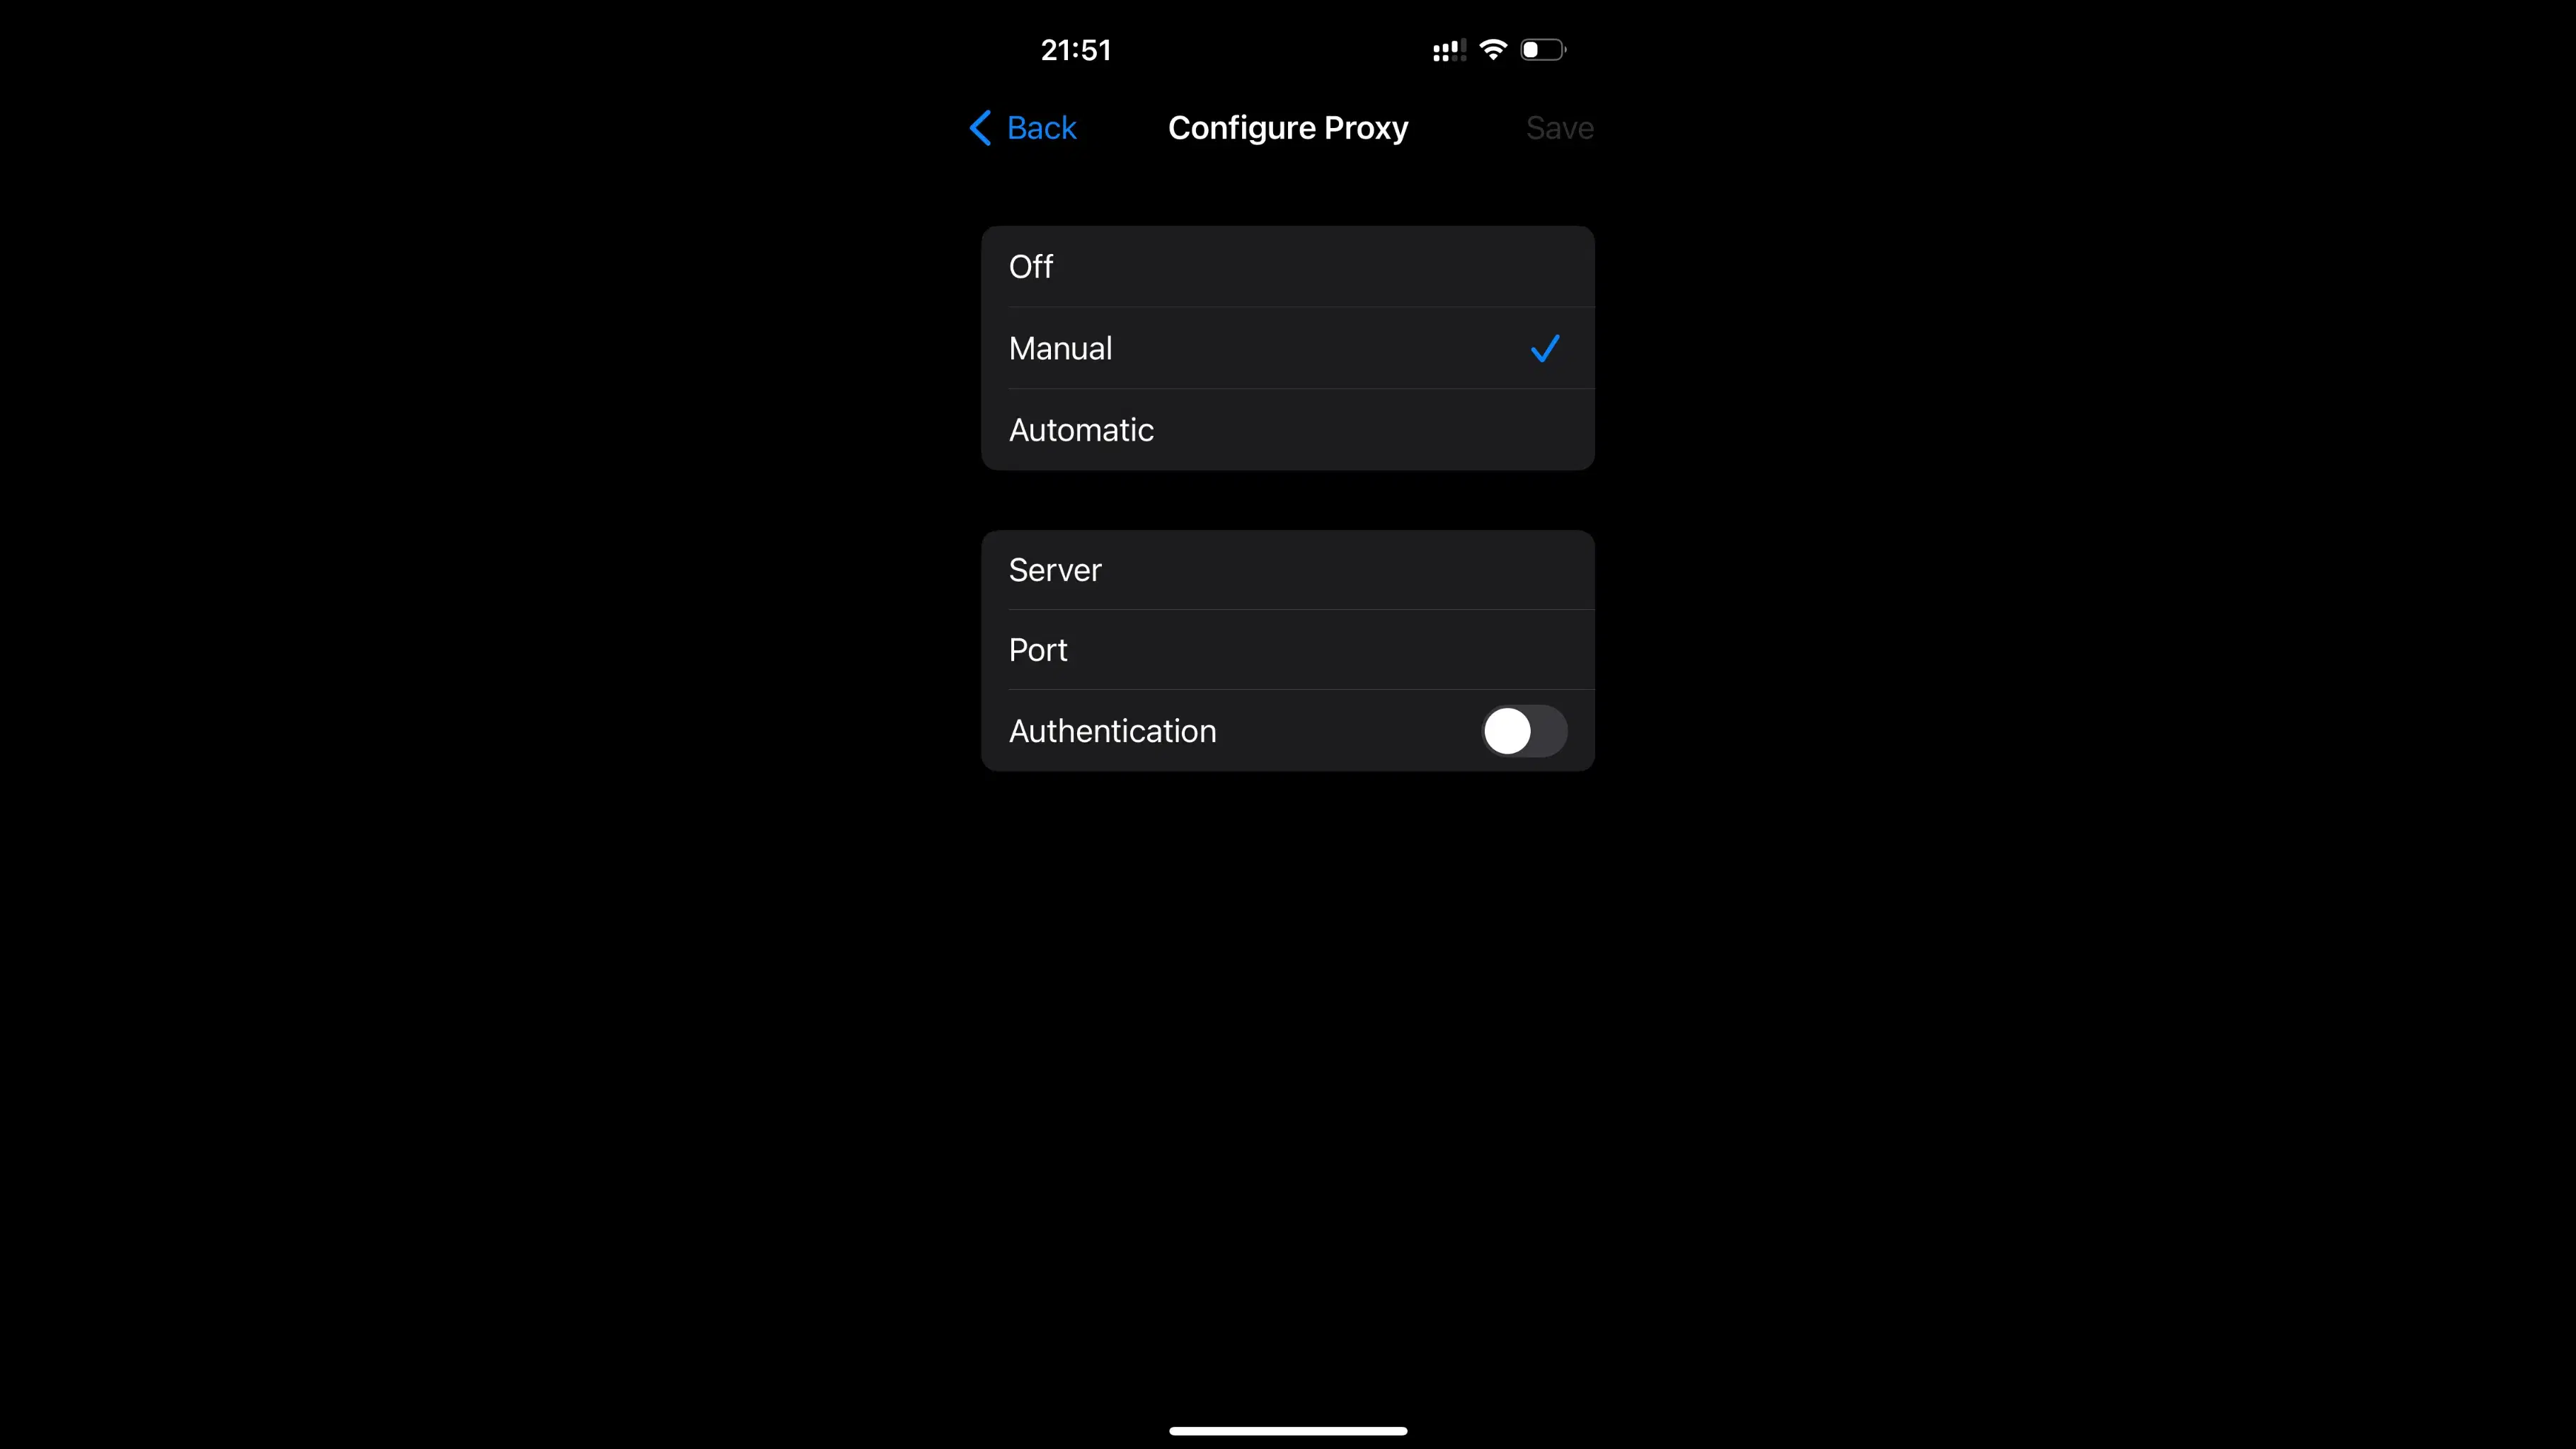
Manual Configuration
If you select Manual:
Enter the Server and Port.
If required, enable Authentication and enter the username and password.
Automatic Configuration
For Automatic configuration:
The device will get the proxy configuration automatically from the network.
Optionally, enter a URL for the auto-configuration script.
Save Settings & Test your proxies
Once you have entered the necessary details, tap the Save button in the top-right corner.
Test your proxies to ensure they are working correctly.
Conclusion
Setting up a proxy server, either system-wide or in specific browsers, bolsters your online privacy and security. This guide provides essential steps for a smooth configuration process across various platforms.


